Do you want to remove hair from the background in Photoshop? This tutorial is for you.
In this article, we will guide you through the step-by-step process of removing hair from a background in Photoshop. It allows you to create flawless and polished images that will make your subjects stand out.
So, let’s dive in and discover the techniques for removing hair from backgrounds in Photoshop.
How to Remove Hair Background in Photoshop (Step by Step Process)
You can use several tools in Photoshop to cut hair from its background. In this tutorial, we will use a quick selection tool and background eraser tool.
So, Let’s start
Method 1: Remove hair from background in Photoshop using hair masking
Step 1: Open Image and Tool Select
Open your selected image in Photoshop. To open your image, go to “File > Open”.
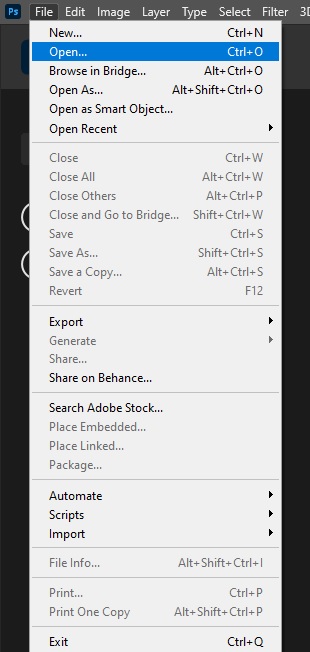
After open your image, make duplicate your background layer. To make a duplicate, select the layer and right-click on your mouse. You can see some option here. Then, you can see a popup window. Now, set the name of the copy layer and press ok.
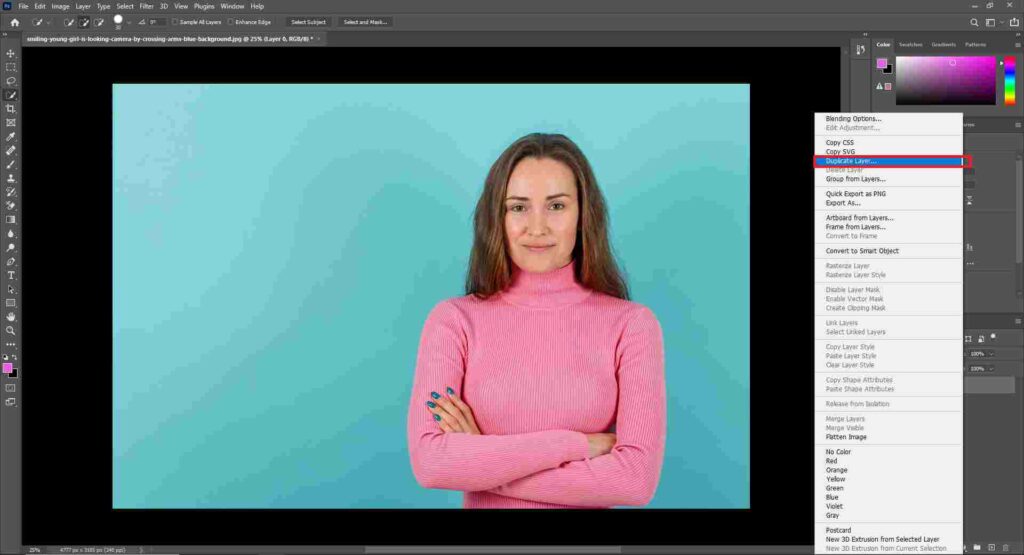
Step 2: Subject Select
In this step, select the “Quick Selection” tool from the toolbar. Use this tool to select a hair by clicking and dragging over the area you want to remove.
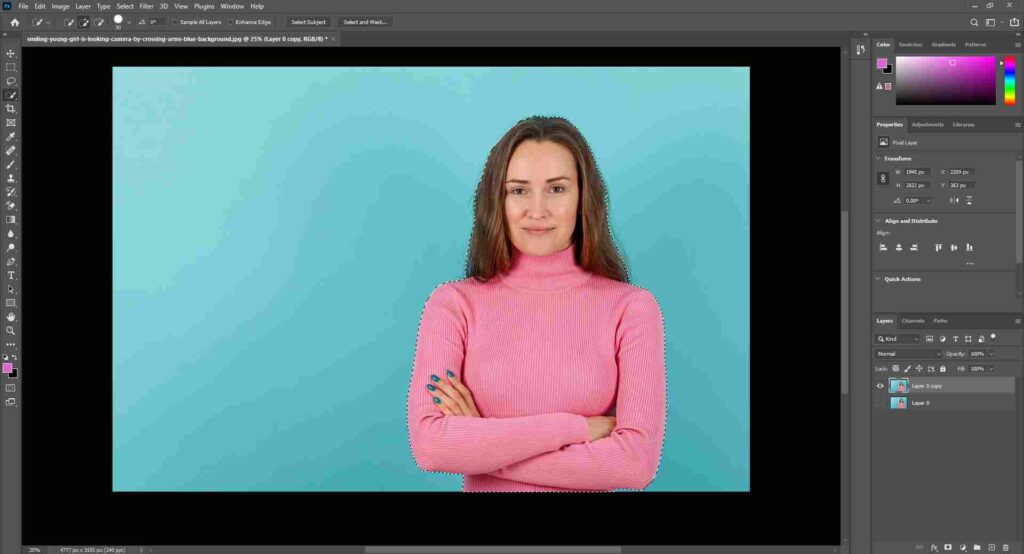
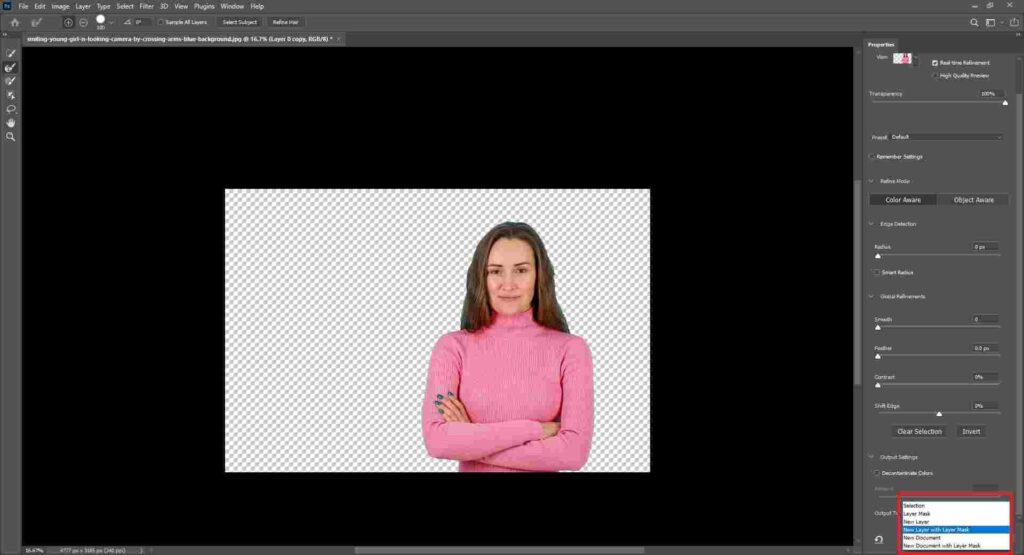
Step 3: Refine Edge
Once you have made the selection, go to the “Select” menu located in the menu bar and choose “Select and Mask.”
Then, you will see a dialogue box bring up where you can further refine the selection. Adjust the sliders for “Smooth,” “Feather,” and “Contrast” to ensure accurate selection around the hair.
You can also use the “Smart Radius” option to detect and refine the edges automatically.
Step 4: Create a Layer Mask
After refining the selection, click on the “Output To” drop-down menu to choose “New Layer with Layer Mask,” which is located in the bottom left of the window. This will create a new layer with a layer mask specifically for the hair.
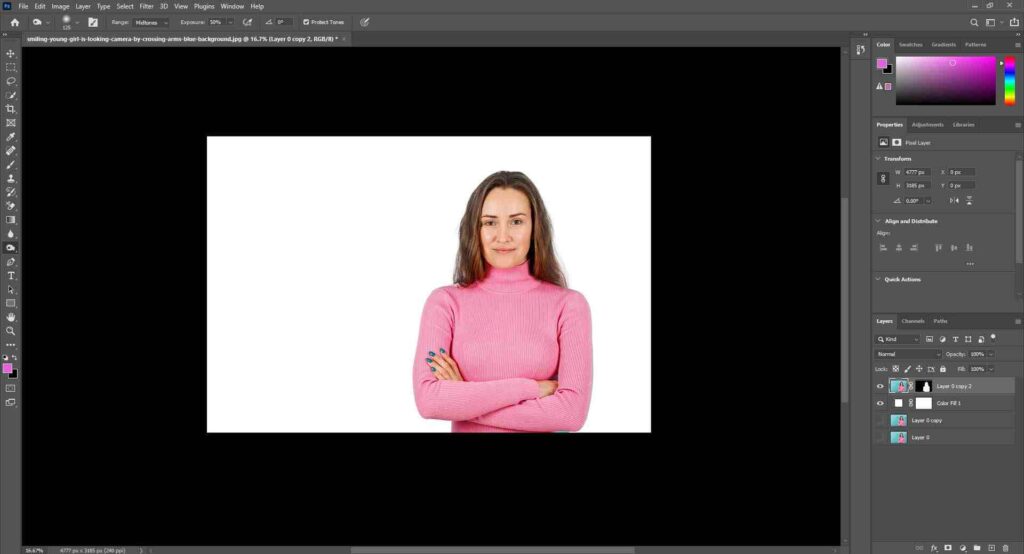
Step 5: Placing New Background
After removing the background, you can place a new background. For positioning, create a new layer from the layer pallet and fill it with your desired background. Then, drag the background layer down the subject’s layer.
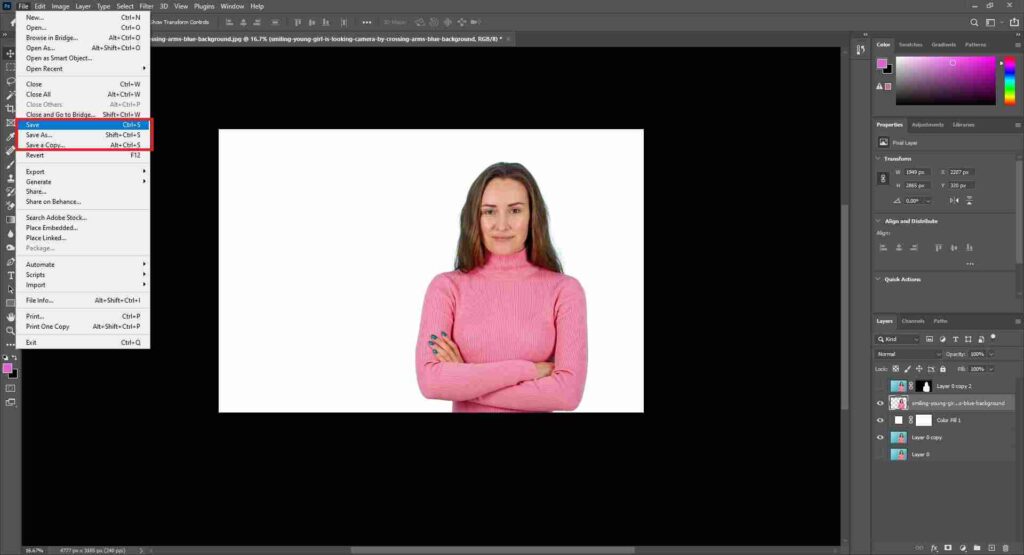
Step 6: Save Images
Once you are satisfied with the removal of the hair background, you can save your image. To save the picture, follow this command: “File > Save.” Here, you can choose a desired file format, such as JPEG, PNG, GIF, and more.
Method 2: Remove Hair from the Background Using the Background Eraser Tool
In this method, we will learn how to remove hair background by using the Background Eraser tool.
Step 1: Open Image and Duplicate Layer
Open your image in Photoshop. To open your image, go to “File > Open.” Then, duplicate the background layer. For this, right-click on the layer and select the duplicate layer option. Then, set a name and press ok to create a duplicate.
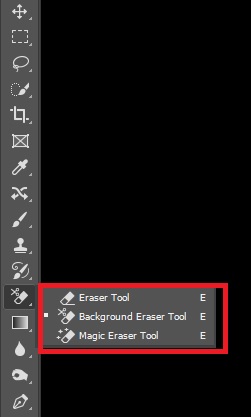
Step 2: Tool Select
Next, go to the toolbar and select the “background eraser” tool. To select this tool, go to eraser tool>background eraser tool. You can select the tool using the keyboard shortcut key E.
Step 3: Tool Setting
Now, set up the tool. Go to the options bar and select the sampling “Background Swatch.” Keep the limits “Discontiguous” and set the tolerance at 40%. Make sure the “Protect Foreground Color” is selected.
Here, you can also customize the brush size and hardness.

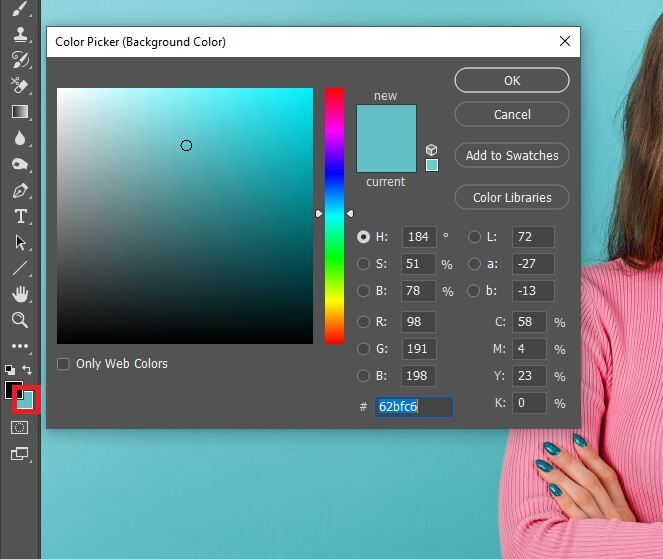
Step 4: Background Color Set
Click on the background color located at the bottom of the toolbar. Then, use the color picker option to select the background color.
Step 5: Background Erase
After selecting the background color, drag your mouse cursor over the edge of the image. Now, you can see the background is erasing. If it does not work, adjust the tolerance and experiment with your image.
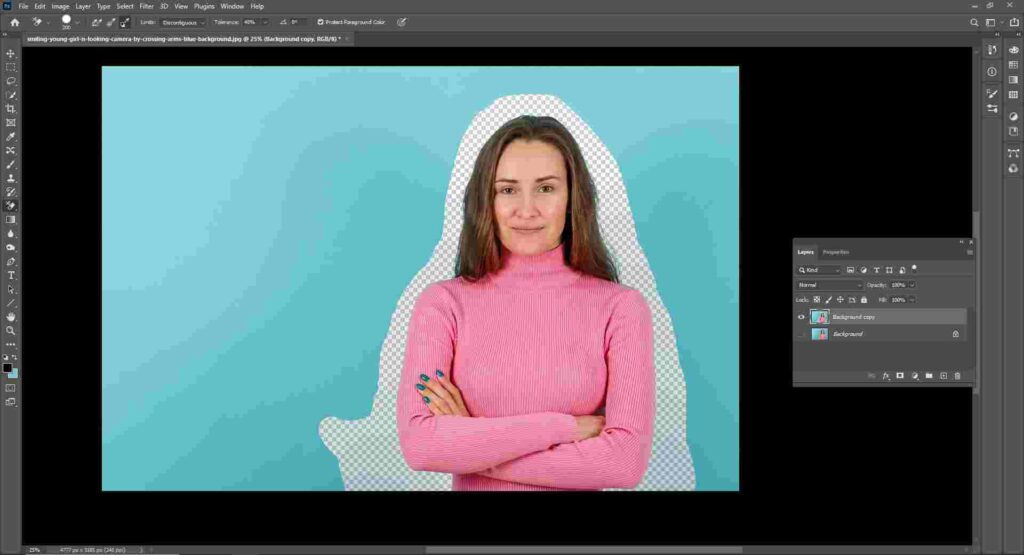
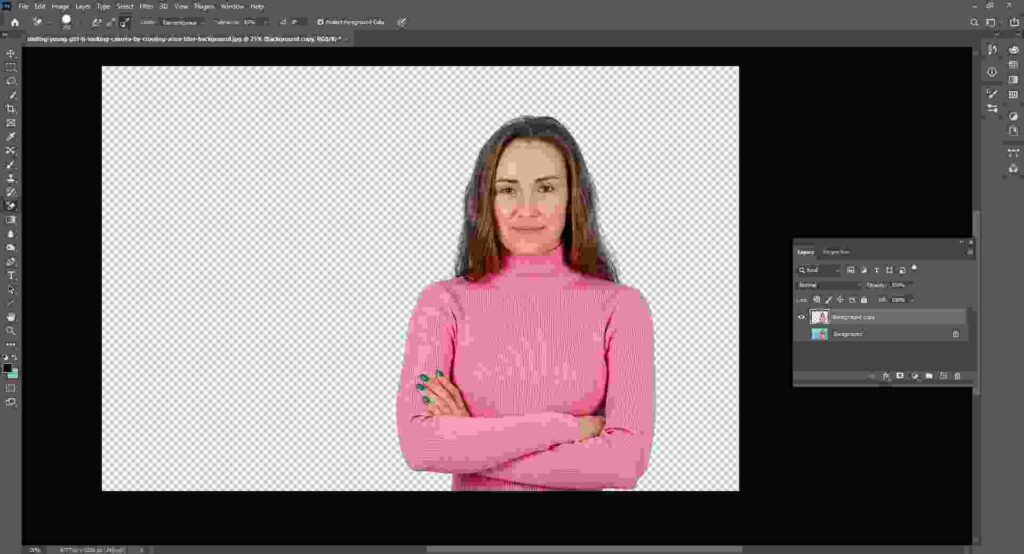
Then, select a selection tool to erase the other part of the background. It might be a lasso tool or pen tool that you can operate perfectly. Now, make a selection of the background and press the Delete key. Your image background is completely removed.
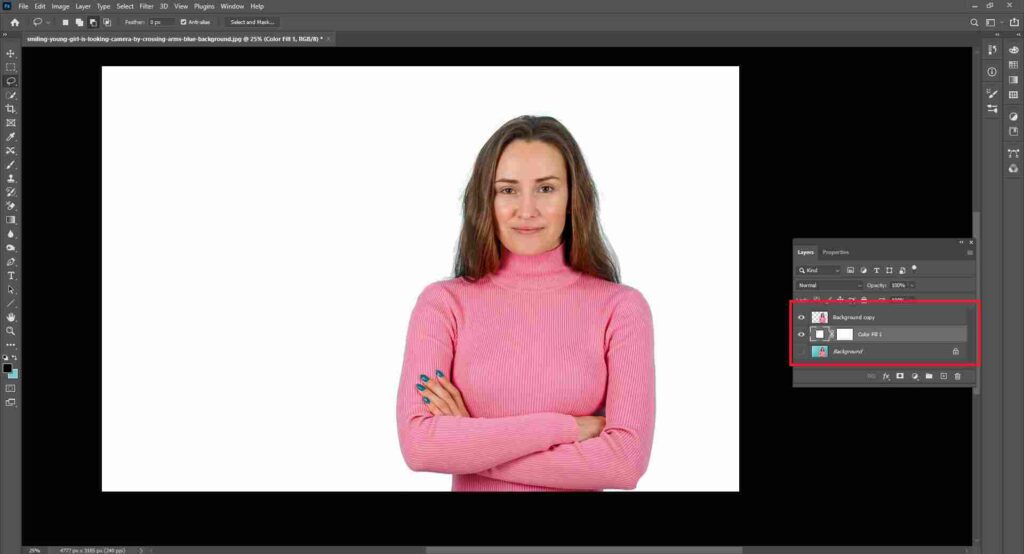
Step 6: Place a New Background
Place a new background. You can import your background or create a new background. Here, we will create a new layer using the “Create a new Layer” option located at the bottom of the layer palette.
Then, fill it with a color and drag the layer down the image layer
Step 7: Save the Image
After placing the image in a new background, save the image. Follow this command: “File > Save” to save. Here, you can choose a file format, such as JPEG, PNG, GIF, and more.
5 Tips for getting a flawless hair cutout
To achieve a flawless hair cutout in Photoshop, you must know some tips and tricks. These additional techniques will enhance your editing skills and help you achieve professional-looking results.
Tip 1: Pay attention to the hair strands. Use the “Smudge Tool” to smooth out any uneven areas or stray hairs. This will create a more polished and natural-looking result.
Tip 2: Utilize the “Layer Mask” to refine your hair cutout further. Carefully use a soft brush to paint over any areas that need additional blending or fine-tuning. This will ensure a transition between the hair and the background.
Tip 3: Experiment with different blending modes. Changing the blending mode on the hair layer helps the overall integration with the new background. Play around with modes like “Multiply” or “Overlay” to see which one works best for your image.
Tip 4: When cloning or healing the hair area, use a small brush size and sample from nearby hair strands. This helps to maintain the original texture and avoid any apparent repetitions or patterns.
Tip 5: Take your time and zoom in for precision. Hair cutouts can be intricate and require attention to detail. Zooming in allows you to work on individual strands, ensuring a more accurate result.
Conclusion
Mastering the hair background removal technique in Photoshop can elevate your photo editing skills to impressive heights.
By applying the steps covered, you’ll enjoy the freedom to create stunning visuals with precision and ease.
Keep practicing, refine your methods, and watch as your images stand out with professional flair!