Trees add depth, texture, and natural beauty to photographs. However, in many creative projects, the background surrounding a tree may not align with your design goals. You might want a clean, minimalist look, or you may be creating a composite image, product mockup, or marketing visual. In such cases, removing the background becomes essential.
Tree background removal is more challenging than removing simple objects. Fine branches, detailed leaves, and soft edges make basic background removal tools ineffective and often result in rough or unnatural edges.
This is where advanced techniques like image masking become crucial. While a clipping path works well for objects with hard, defined edges, image masking is the best solution for complex subjects such as trees, hair, smoke, or fur.
In this guide, you will learn how to remove tree backgrounds in Photoshop step by step, using professional techniques that deliver clean, realistic results even if you are new to Photoshop.
Why Image Masking Is Best for Trees
Trees contain intricate details that cannot be accurately separated using automated selection tools. Image masking allows you to isolate complex edges with precision, preserving natural details while removing unwanted backgrounds. For professional-quality results, image masking is the recommended approach.
A Step-by-step guide: how to remove background from trees in Photoshop
Step 1: Open the Image in Photoshop
Open your Image in Photoshop. Go to “File > Open” or drag and drop the photo in your Photoshop to open the Image.
Step 2: Create a Copy of Blue Channel
First, navigate to the Channels panel, which is located next to the Layers panel. If you don’t see it, go to Window > Channels from the top menu to make it visible.
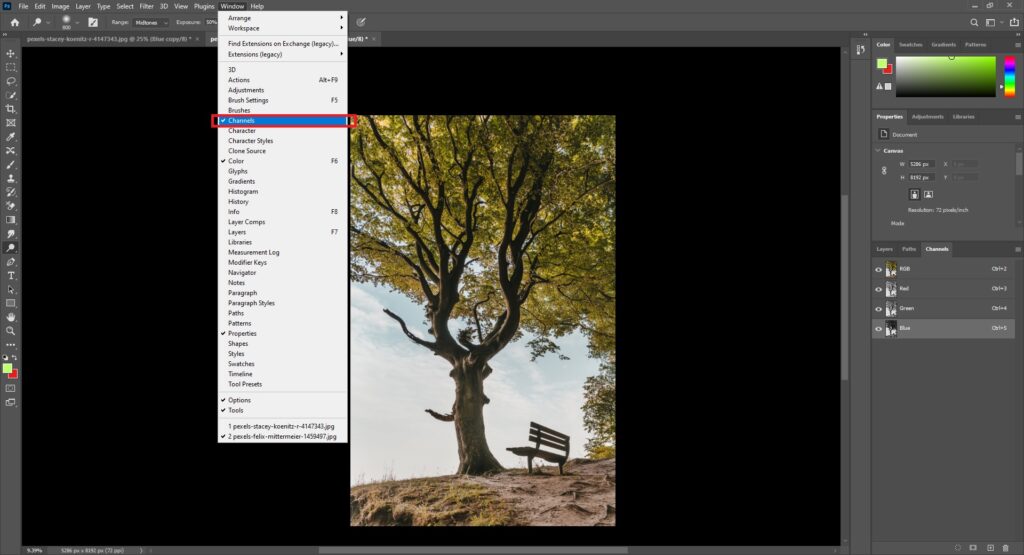
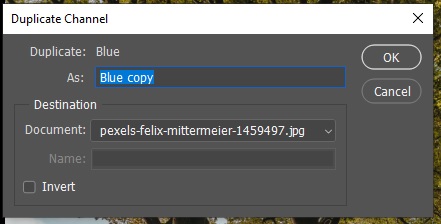
Then, select the blue channel and right-click on your mouse. You will see two options here. From there, click on the “Duplicate Channel” option. Now, a popup window will appear. There, set the channel name and click OK.
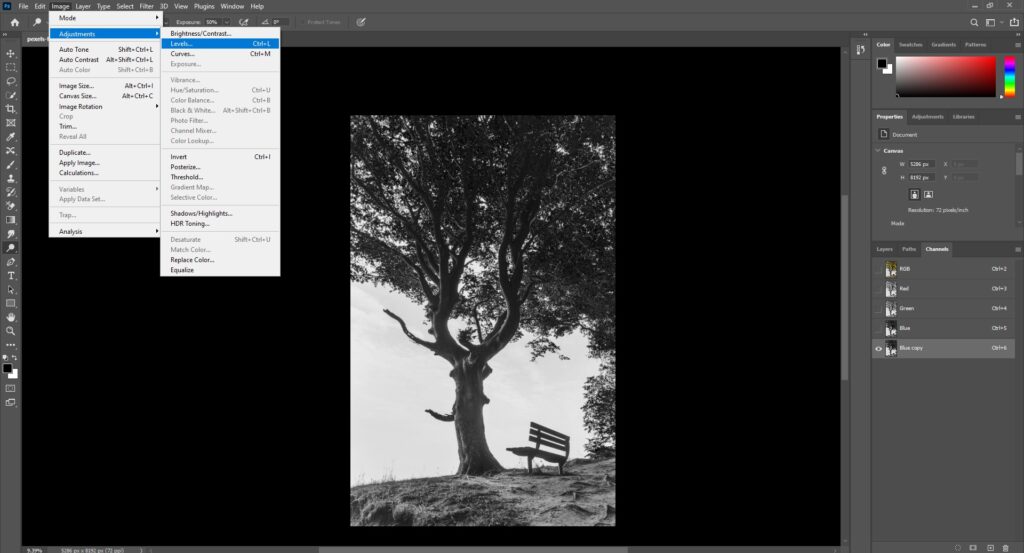
Then, turn off the visibility of all channels except the copy channel.

Step 3: Adjustment Level
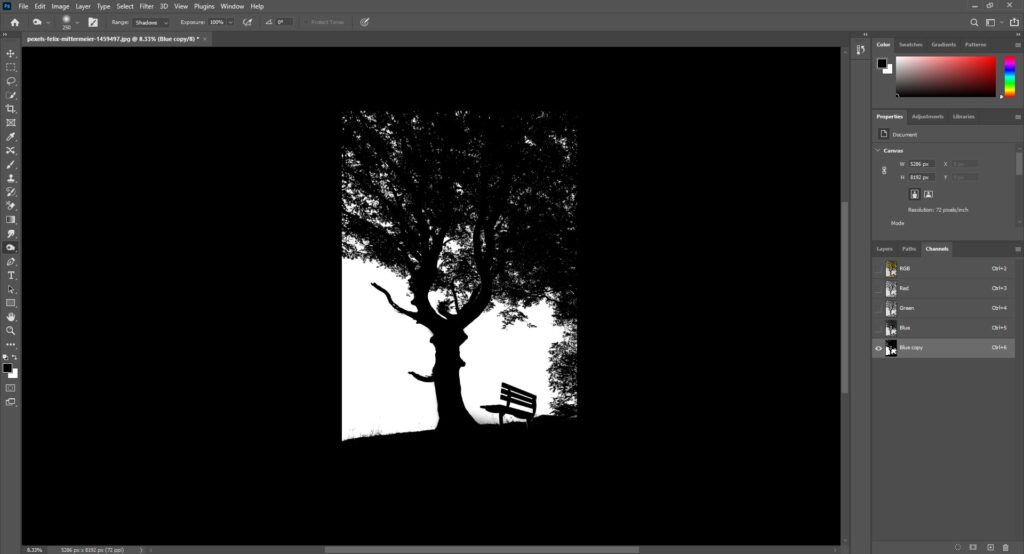
In the next step, you’ll need to adjust the Levels to make the dark areas darker and the white areas brighter. To do this, go to Image > Adjustments > Levels. Once opened, you’ll see the Levels adjustment panel where you can fine-tune the contrast.
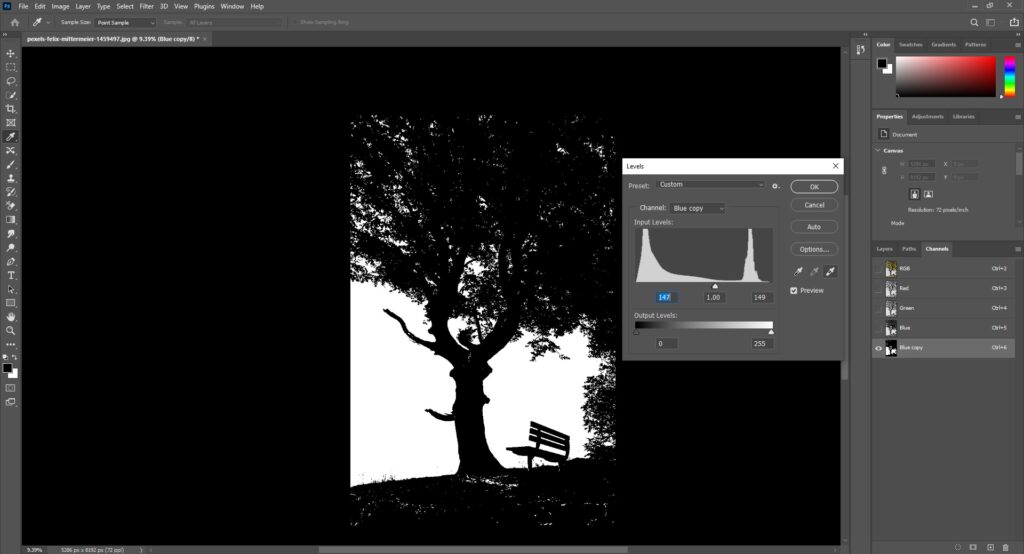
Now, move the shadow slider to the right until the tree appears fully dark. Next, adjust the highlight slider by moving it to the left to brighten the background. Feel free to experiment until you achieve a clean contrast between the tree and the background.
The goal is to make the tree completely dark while keeping the background pure white. The exact slider values will vary depending on your image.
Once you’re satisfied with the result—where the tree is entirely dark and the background is white—click “OK” to apply the changes.
Step 4: Use Dodge and Burn Tools
If the Levels adjustment doesn’t give you the desired result, you can fine-tune the image using the Dodge and Burn tools. Select the Dodge tool to brighten the white areas—simply paint over the parts you want to highlight.
Then, switch to the Burn tool to darken the areas you want to keep. Paint over those regions carefully. Once done, you’ll notice the image is now well-prepared with improved contrast and clarity.
Step 5: Create a Selection
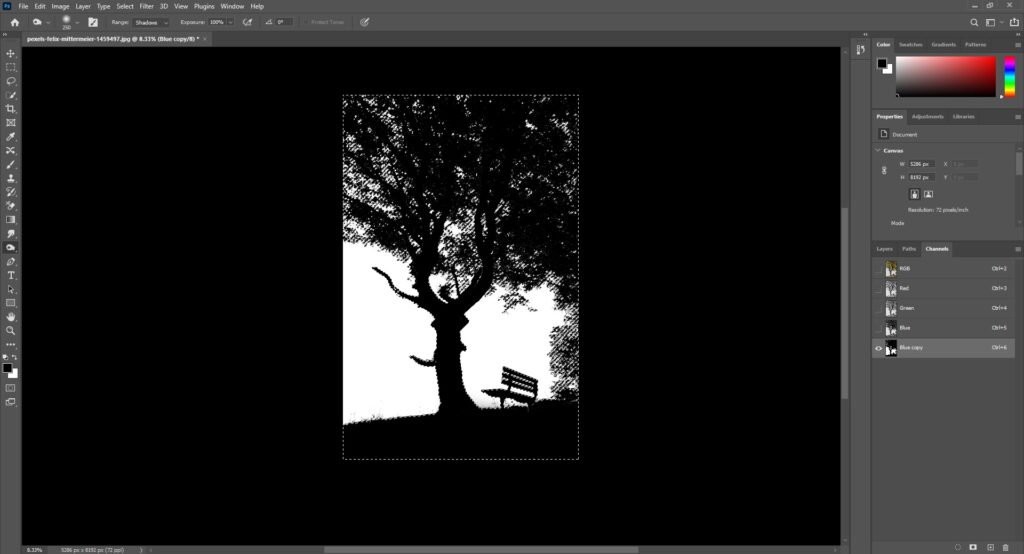
After the slider is in the perfect position, you have to select the tree. To choose the tree, press and hold the Ctrl key and click on the tree icon located in the copy channel.
Step 6: Layer Mask
Once you’ve selected the tree, go to the bottom of the Layers panel and click on the Layer Mask icon. This will instantly remove the background and keep only the tree visible.
If the tree disappears instead, it means the selection was inverted. To fix this, simply press Ctrl + I to invert the mask. Your tree should now appear correctly
Step 7: Refine Edge
After creating a mask, you might notice that some important parts of the image have been accidentally removed. To bring them back, double-click on the layer mask icon. A pop-up window will appear.
Select the Brush Tool, and carefully paint over the areas you want to restore. This will reveal the hidden parts of the image and refine your mask.
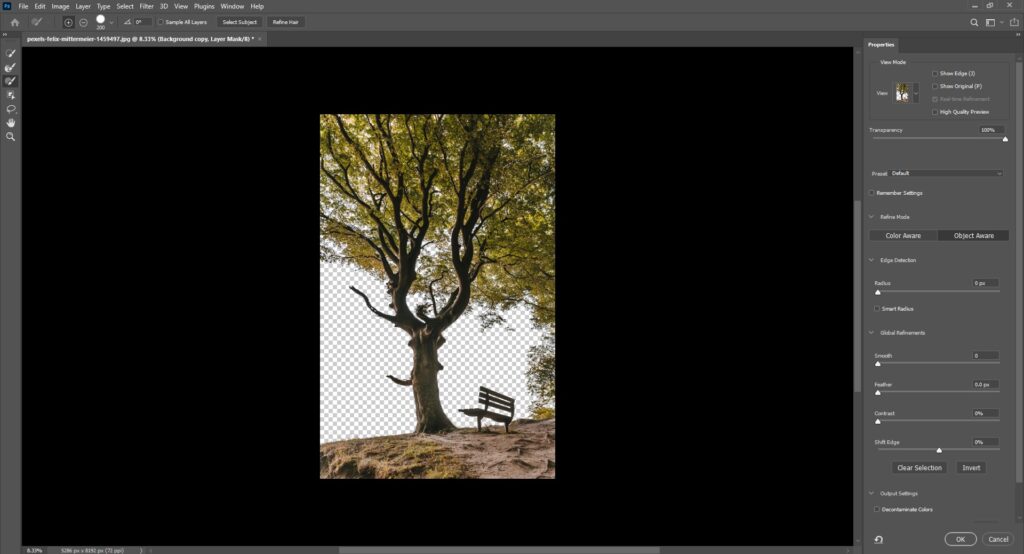
To remove some unwanted parts, press and hold the Alt key and paint over the part.
Step 8: Place Background
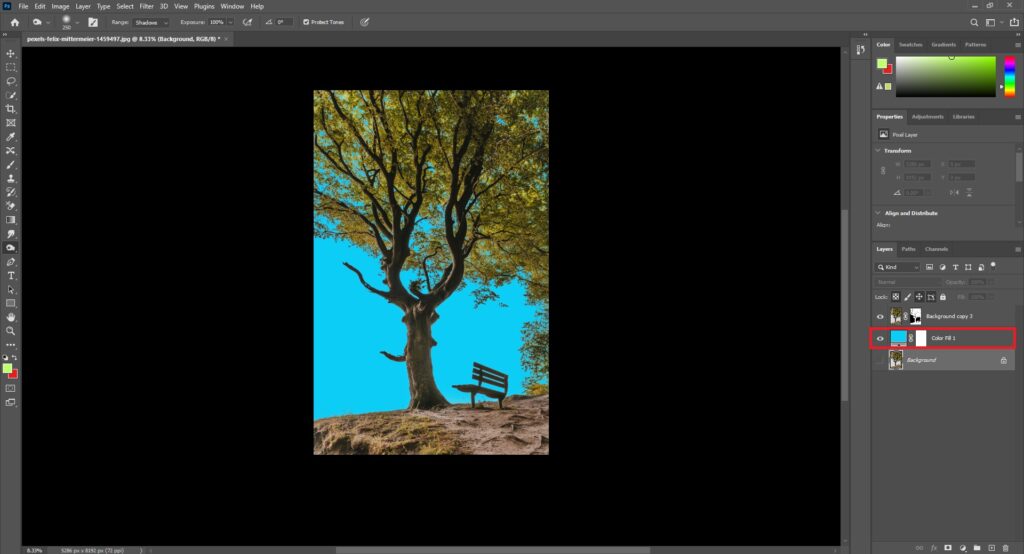
Your tree background is almost removed. If you want to replace the tree with a new background, import the background and keep the background layer behind the tree layer.
You can also create an adjustment layer by clicking on the Create new fill option. You can see the option at the bottom of the layer panel.
Saving and exporting your images with transparent backgrounds
Once you’ve successfully removed the tree background in Photoshop, it’s important to save and export the image with transparency. This ensures you can use it across various projects—without any background limitations.
Go to File > Save As, and choose a format that supports transparency, such as PNG or TIFF. These formats preserve the transparent areas in your image.
After saving, it’s a good idea to double-check the exported file. Open it in another program or place it over a different background to confirm that the transparency is working correctly.
By following these steps, you can effectively remove tree backgrounds in Photoshop and export your images for flexible, professional use.
Conclusion
Removing tree backgrounds in Photoshop is a detailed and time-consuming process due to the complexity of branches and leaves. However, by using image masking techniques, along with channel duplication, level adjustments, and mask refinement, you can achieve clean, professional-quality results.
Always review your final image carefully and test it on different backgrounds to ensure seamless blending. With practice and patience, these techniques will help you create versatile, high-quality visuals suitable for any creative project. If you want to background removal service, Clipping Path Action is the best company for background removal.
Related Blogs
how to change brush color in photoshop
how to fix grainy pictures in photoshop
how to see through cloths in photoshop
how to create drop shadow in photoshop

