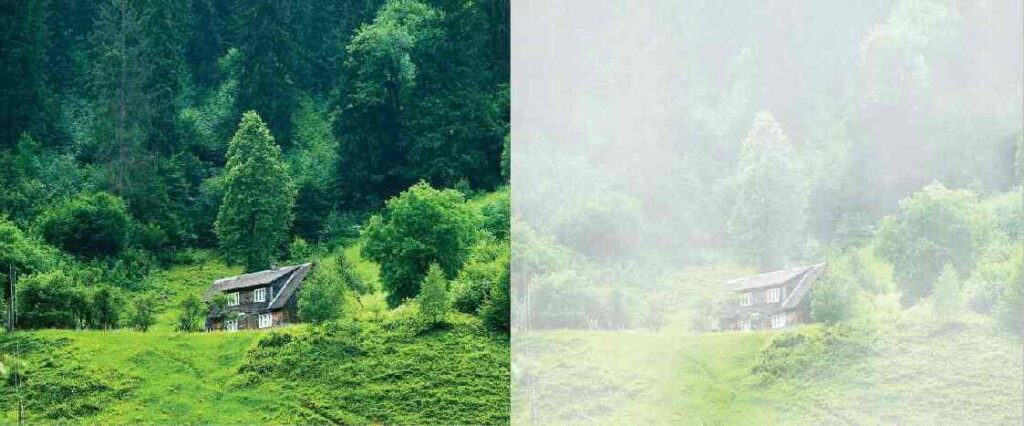
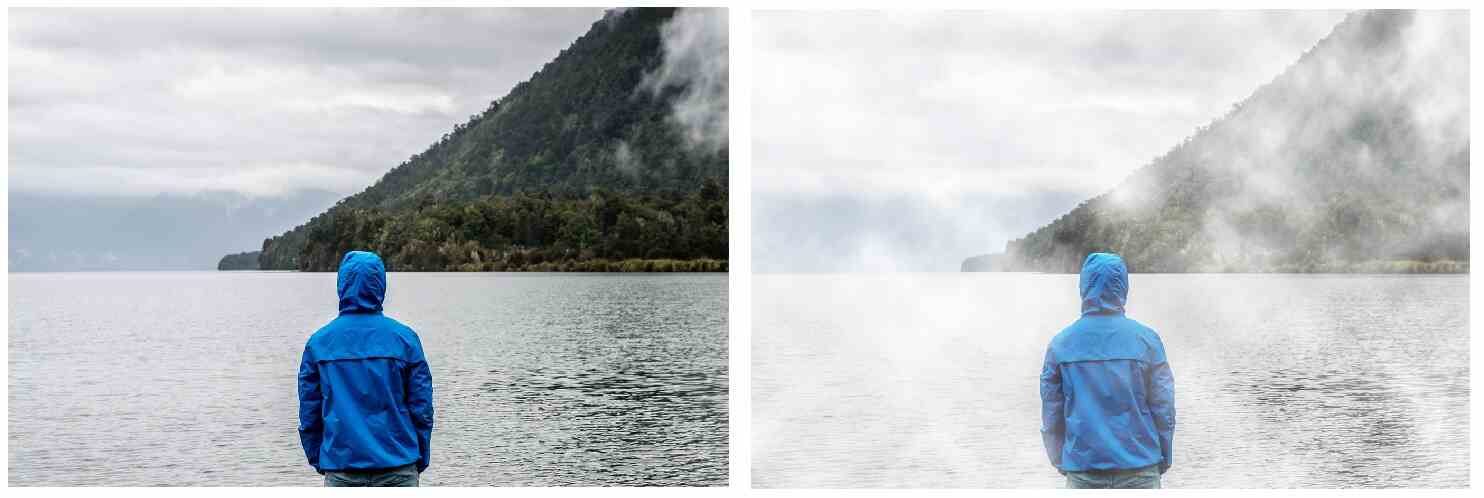
Have you ever wanted to create a mysterious, atmospheric fog effect in your images?
With the power of Photoshop, you can easily achieve this desired look. Adding fog can dramatically enhance the mood and composition of your images.
Creating fog may seem complex, but it can be simple with the proper techniques. By following a few simple steps and utilizing the Photoshop tool, you can bring your vision to life.
In this article, we will guide you through creating fog in Photoshop. From selecting the right brush to adjusting opacity levels, we will show you how to achieve a realistic and captivating fog effect that will take your photos to the next level.
So, if you’re ready to enhance your images with a touch of mystique, keep reading to learn how to make fog in Photoshop.
Method 1: How to make fog in Photoshop Using Photoshop Render Filter
Creating misty effects in Photoshop for your photos is easier than you might think. But you might be wondering how I can make fog in Photoshop. We’ll learn how to add fog in Photoshop by applying render filters.
You can make cloud and fog effects in Photoshop using this filter. Let’s dive into how to create fog in Photoshop using the Render Filters.
Step 1: Open Image In Photoshop
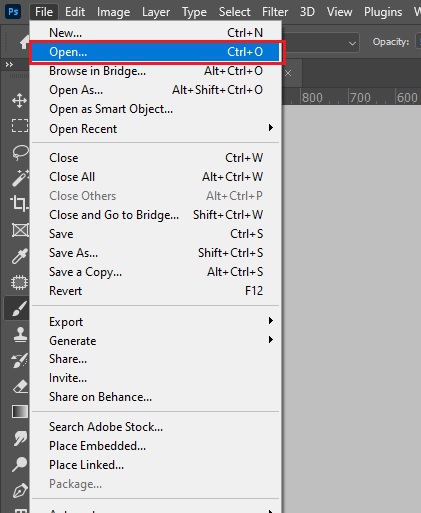
Launch Photoshop and open your image. Go to “File > Open” to open your image. If you want to use the keyboard shortcut, press “Ctrl+O.”
Step 2: Duplicate layer
Make a copy of the background layer for later use if needed. So, Go to the Layers panel and select the Background layer. Then, right-click your mouse. You can see some options visible here.
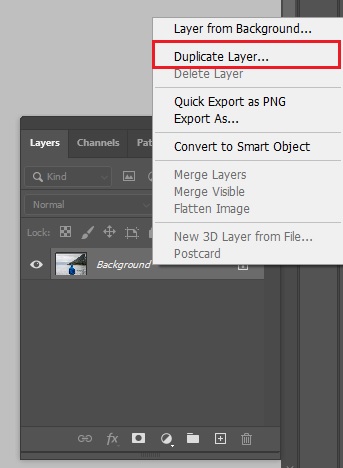
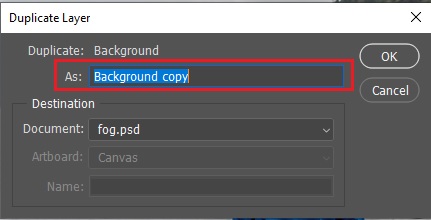
Click on the Duplicate Layer option. When you click, a popup window will open. Here, set the name of the layer and click OK. Now, you can see a duplicate layer of the Background layer in the Layer Panel.
Step 3: Add a Blank Layer
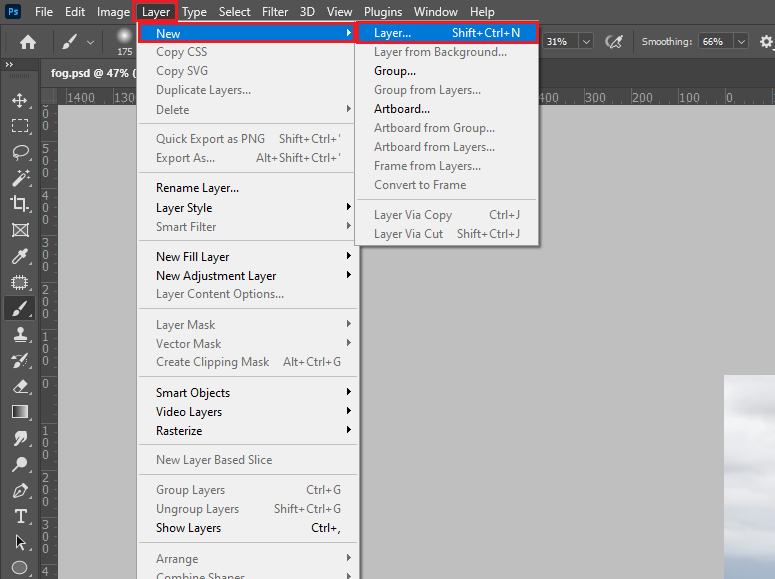
In this step, add a blank layer above your image layers. To add, go to “Layer > Layer > Create a New Layer”. You can do the same task by pressing the keyboard shortcut “Ctrl+Shift+N.”
Step 4: Add Cloud Render Filter
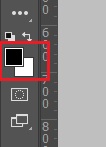
Before applying the render filter, ensure that the image’s foreground color is white and the background color is black. If the foreground and background colors differ, press the D key to make the colors black and white. To switch the colors of the foreground and background, use the color switch icon or press the X key.
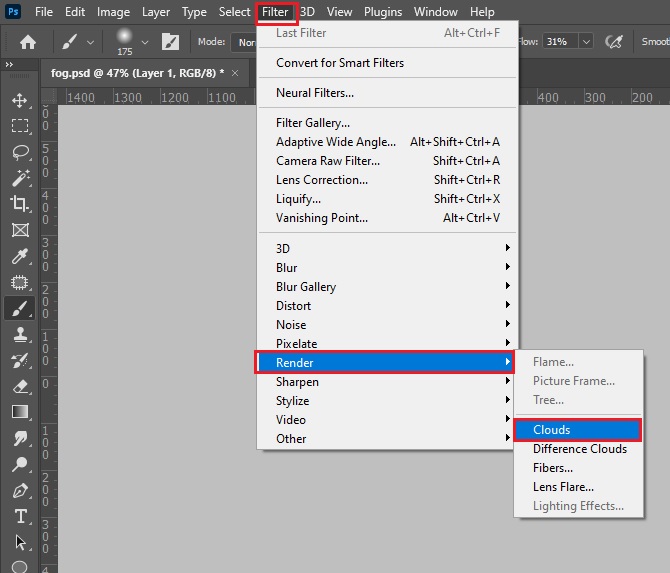
When you set the color, go to “Filter > Render > Clouds” to apply the filter. When the filter is added, your image will be covered with white and black smudges that look like clouds.
Step 5: Change Blending Mode
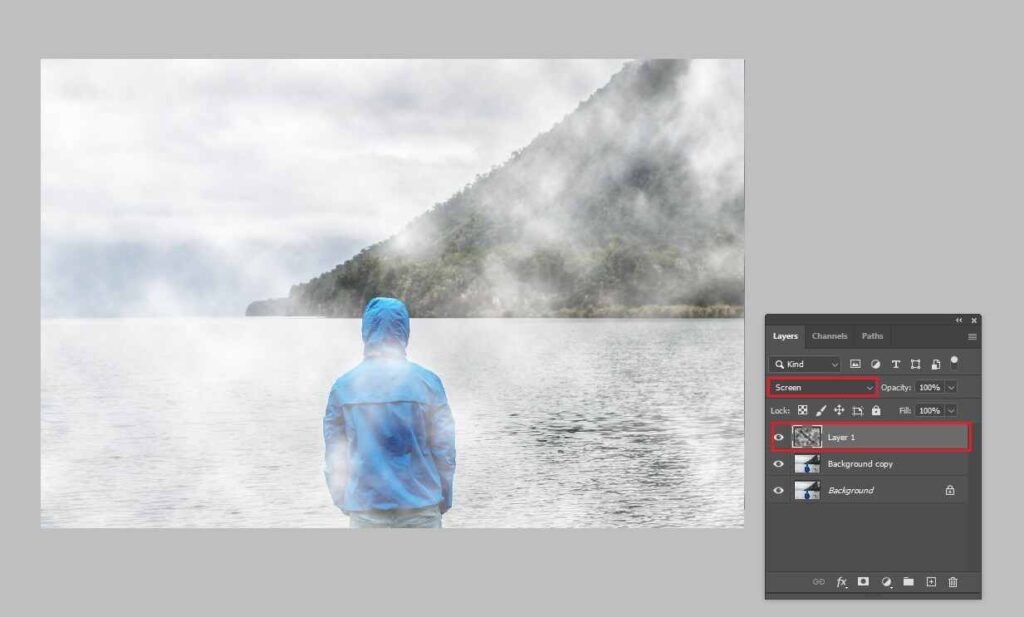
After applying the render filter, you have to change the blending mode to remove the black color of the layer. Next, go to the layer panel and click the blending modes drop-down menu. Here, click on the Screen mode.
When you set the blending mode to Screen, you can see the black color has vanished, and the image looks cloudy.
Step 6: Increase Cloud Layer Size
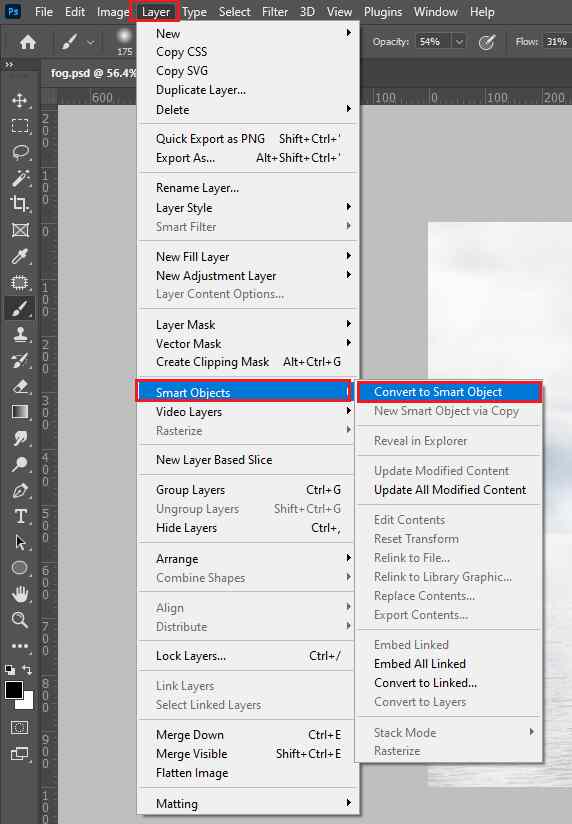
In this step, you have to increase the size of the cloud layer. But you must convert the layer to a smart object. To do it, select the layer and right-click on your mouse. Now, click on Convert to Smart Object.
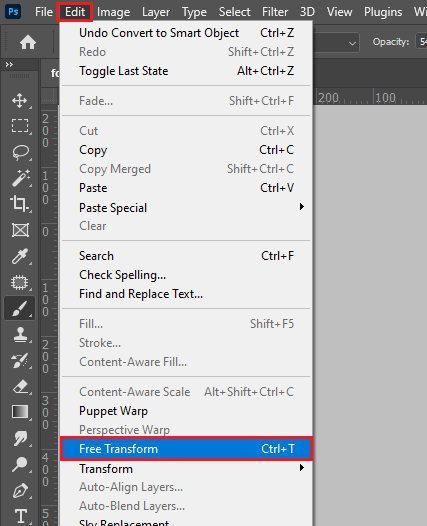
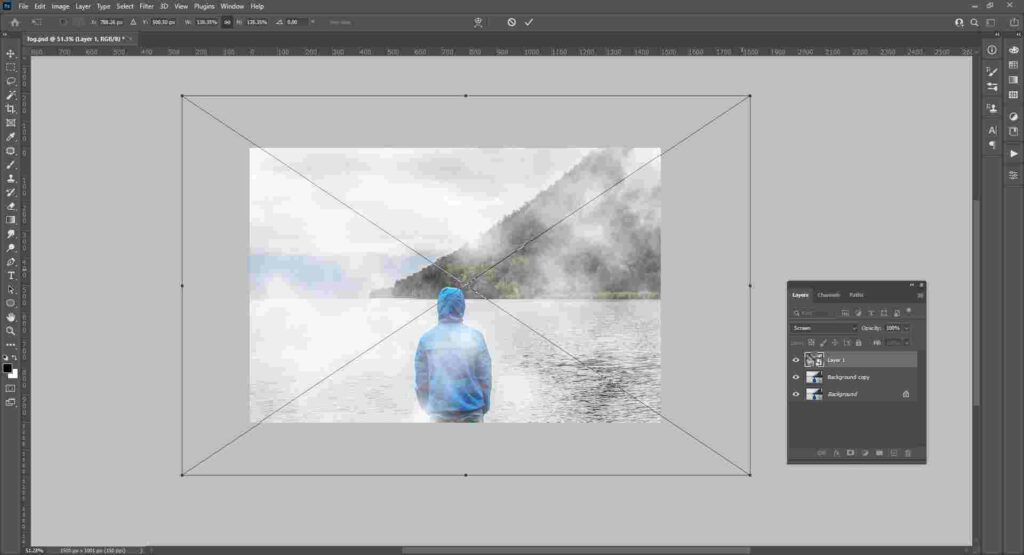
After converting the layer, go to Edit > Free Transform to make free transform. Now, click on the corner point, increase it, and click the checkmark in the option bar.
The layer will extend beyond the canvas size and will be invisible. So, the cloud will be enormous without any distractions.
Step 7: Duplicate Cloud Layer
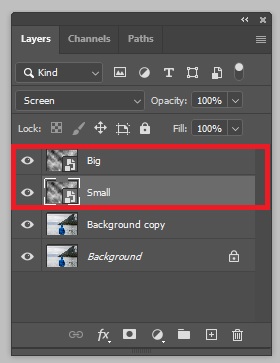
Now, duplicate the cloud layer by pressing Ctrl+J from the keyboard because we add fog to photos, not clouds. So, we will make the fog thicker to make the image realistic. After duplicating the layer, rename the layers. One of them is small, and the other one is Big.
Step 8: Resize the Small Layer
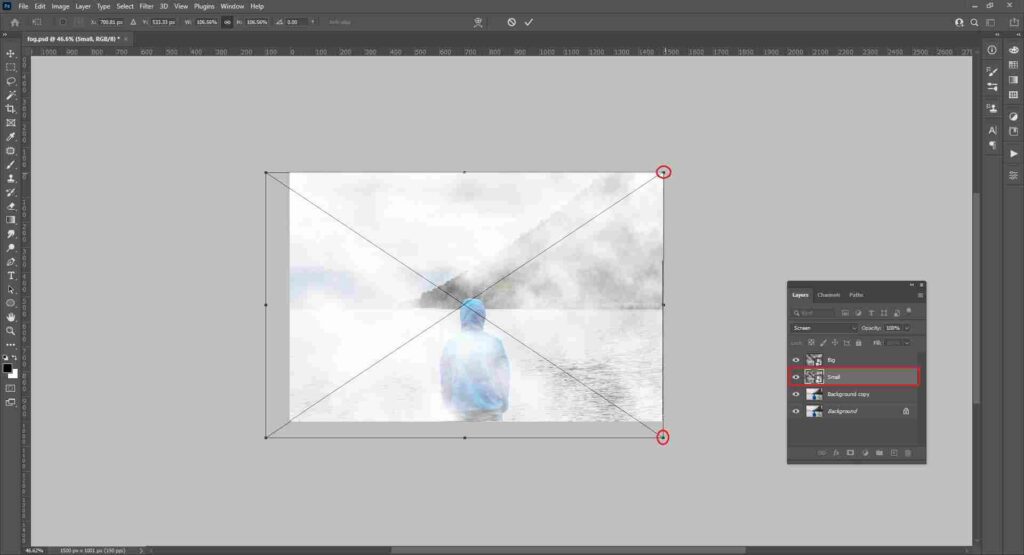
When we will keep both layer sizes the same, it will look unnatural. So, we will decrease the small layer size to make the Photoshop fog effect more realistic. Go to Edit > Free Transform to enter the free transform tool.
Here, click on the corner points and drag them to the layer’s inner. When satisfied with the resizing, click the checkmark in the Options Bar.
Step 9: Adjust Opacity
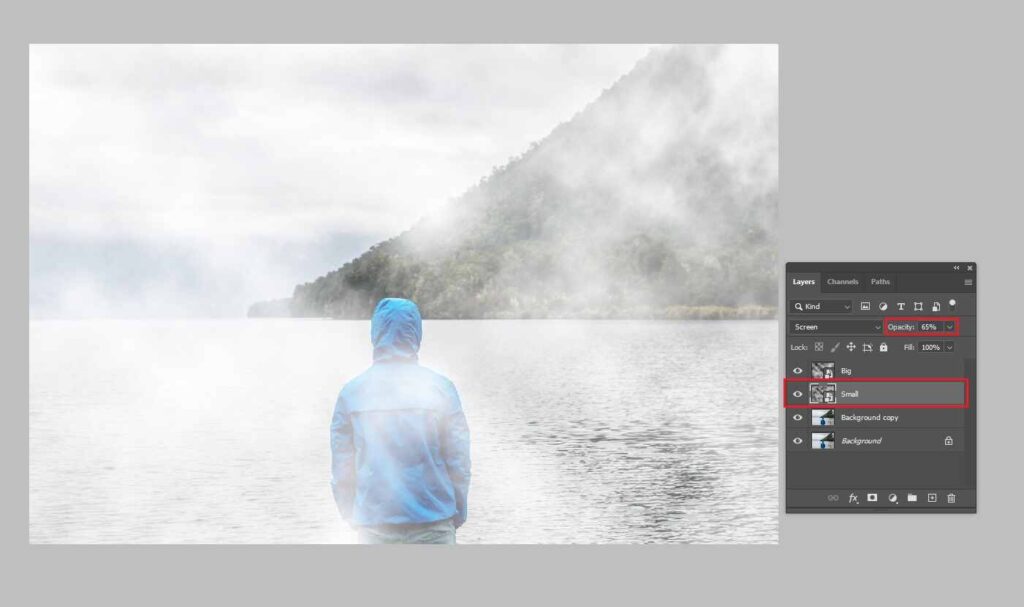
Now, adjust the opacity of the cloud layers to make the fog realistic. Go to the layer panel and select the big layer. Then, adjust the opacity by using the slider. You can see the image below; we keep the opacity at 30%.
Step 10: Save Image
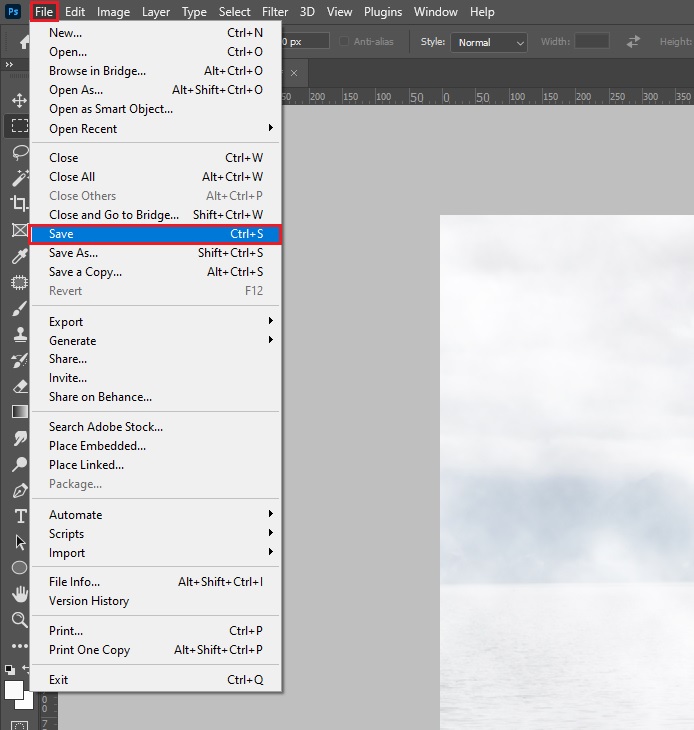
When you are satisfied, save your image.
You can successfully add fog to your image following our Photoshop add fog tutorial.

Method 2: How to Add Fog Photoshop Using Brush Preset
In the previous method, we have already learned how to create fog Photoshop using Render Filters. We will learn how to create fog Photoshop using brush presets step-by-step.
Step1: Open the Image and Make a Duplicate
Open your image in Photoshop. Go to file> Open to open your image.
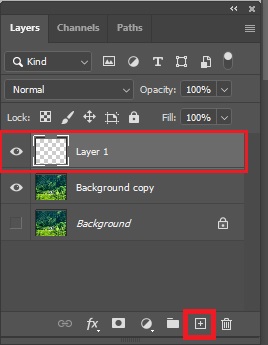
Now, duplicate your original layer to use later if needed. Select the original layer and drag it to the “Create a New Layer” icon to replicate the original layer.
Step 2: Create a Blank Layer
Again, go to the Layer Panel and click the “Create a New Layer” icon. Now, you can see an empty layer is created. Make sure that the blank layer you created is above the layers.
Step 3: Select brush tool
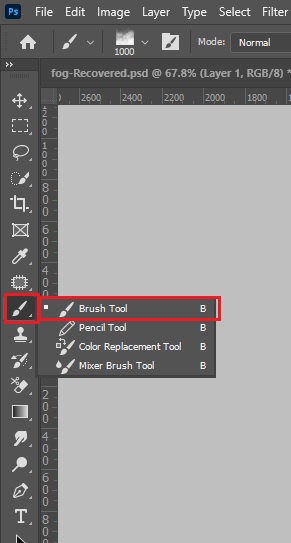
Now, you need to select brush tool. So, go to the tool panel and select it. Orpress the L key to select the tool.
Step 4: Import Brush
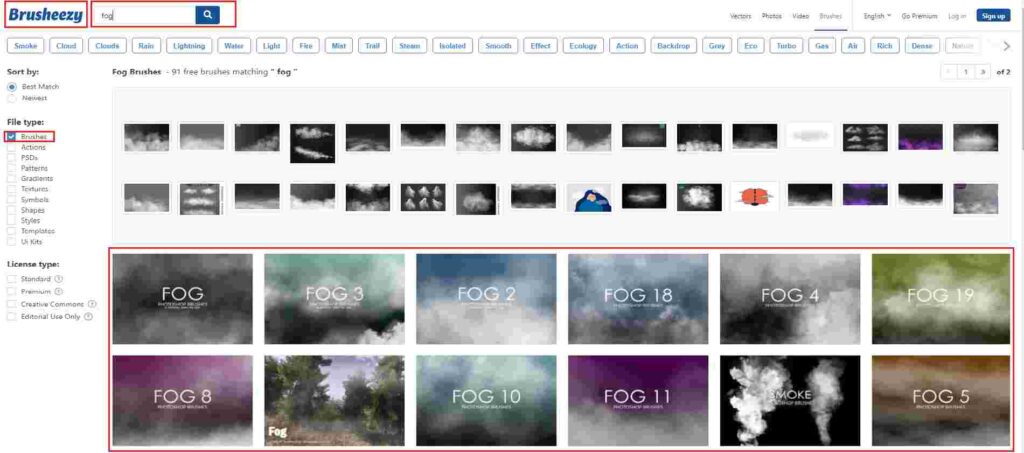
Firstly, go to Brusheezy.com. Then, search for a brush file. When you download the file, unzip it using an application like WinRAR.
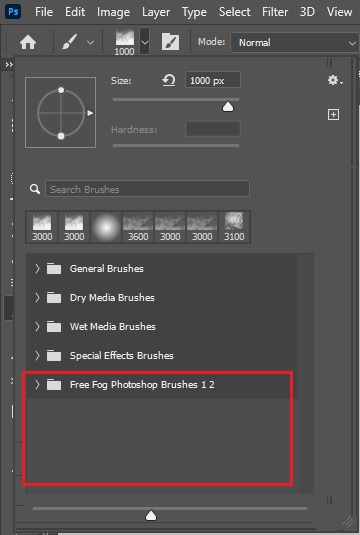
Now, go to the option bar of Photoshop. Then click on the Brush preset picker. After that, click on the settings icon. Here, you can see some options. Now click on the Import Brushes.
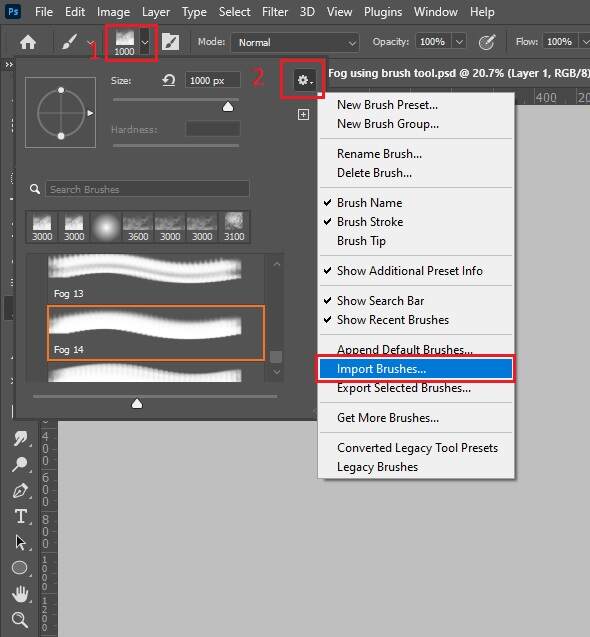
Then, select the brush file that you downloaded before from the website. Now, your brush preset is imported. You can find it at the bottom of the brush preset list.
Step 5: Painting
Firstly, customize the brush setting from the brush property, such as size and roundness angle. If you cannot find the property, go to window> Brush to see it.
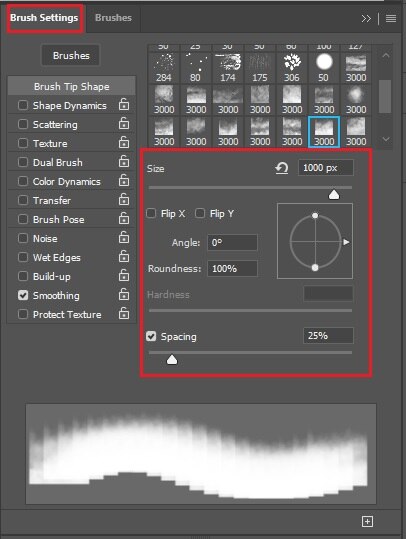
Now, paint over the blank layer very carefully. When you paint, keep the background fog deeper than the foreground. Please don’t overdo it. Otherwise, it will make the fog unnatural.
Step 6: Adjust Opacity
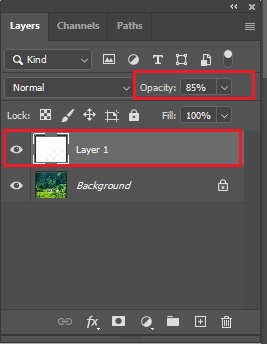
Now, go to the layer panel and adjust the opacity of the fog layer using the opacity slider. You can see the image below; we keep the opacity at 85%. You can experiment with your image for the best opacity.
Step 7: Save Image
When you think the fog looks natural, save your image in storage.
Then, set a filename and format (PNG, JPG, GIFF) and click Save. Finally, you can add fog to photos in Photoshop. Now, you know how easy it is to add fog for Photoshop.
