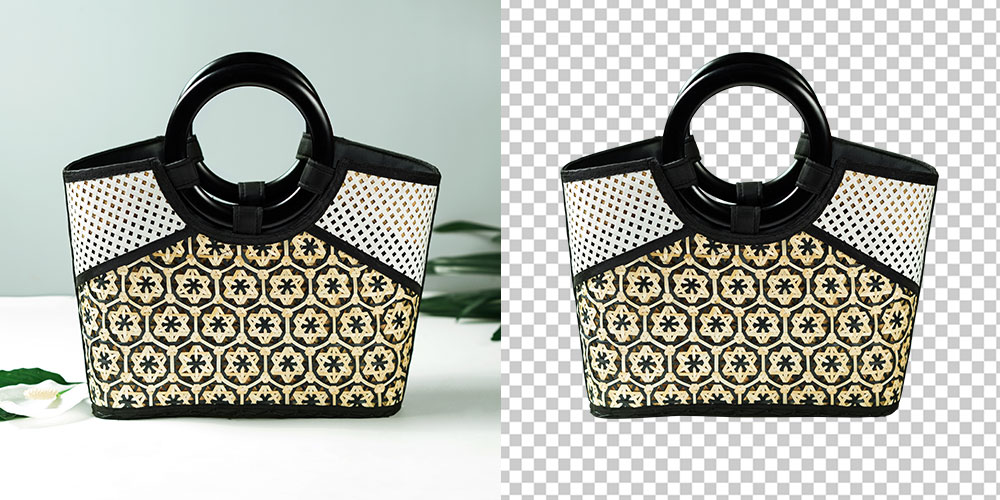
You may need to cut out images in any scenarios. Whether it is for background removal or you may need to edit specific portions of an image, the image cut-out technique may help in both cases.
Lots of photo editing software is available online for cut out pictures. Among these most of the clipping path companies use Adobe Photoshop and GIMP in regular basis. Both photo editing software are well-renowned and used widely in clipping path services. Today, we will discuss how to cut out images in GIMP and Photoshop
Why GIMP?
GIMP is an open-source photo editing program. It has lots of features for editing images. You may easily do your editing task like clipping path, image retouching, product photo editing etc. And, you don’t have to pay for this software. Many editors prefer this software as it is cost-free.
However, we always recommend adobe photoshop for professional work. But, you have to pay for this program. Though you can use the photoshop crack version, liability is yours. we don’t recommend it
That’s the reason we cover both in the same article. You will know how to cut out images in GIMP and adobe photoshop.
Method 1: How to Cut Out an Image in Gimp [ Path Tool ]
While you try to cut out any object from its background, using the path tool should be your first choice. Because you can work at the end point of an object. If you use other tools, it may deteriorate some portions of your image. But, in cases of using the path tool, these chances are very few. It is also renowned as a photo clipping path technique in market. However, we will now discuss; how to cut out images in GIMP using the path tool below.
Step One: Open an Image in GIMP
At first, you need to open an image in GIMP, drag it, and drop it into the GIMP interface.
Be careful about the files format, and you must use a standard file format like JPG, JPEG, PSD, PNG, TIFF.
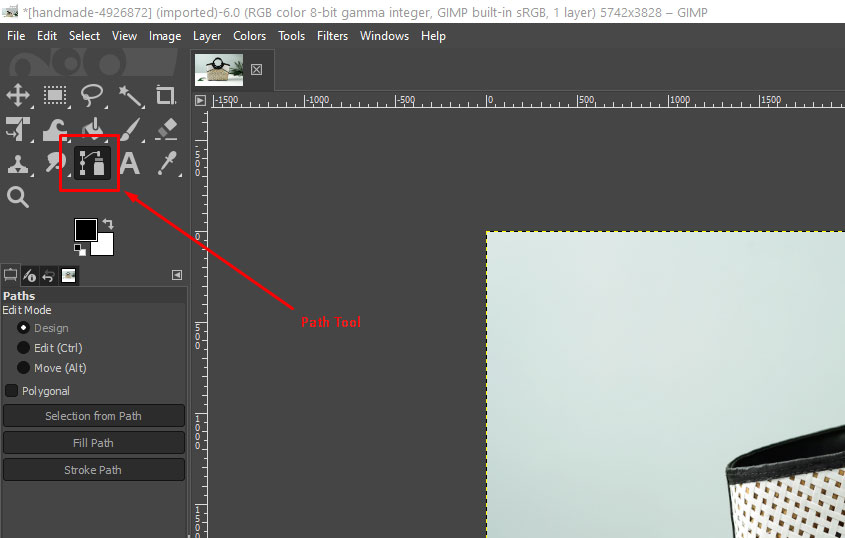
Step Two: Select the Path Tool
After opening your image in GIMP, you need to select the path tool from the left side toolbar.
Step Three: Start Using the Path Tool
After selecting the path tool then you have to create a path around the expected objects. Before you start creating a path, make your image zoom in 200% to 300%, It will help you make a perfect path around the object.
Before making a path-by-path tool, you need to know what the anchor point is? Anchor is a white circle connector that is connected before and after white lines. Every anchor has two handles for making precise lines. If your drown path line is wrong, you can correct it by anchor handle dragging or moving.
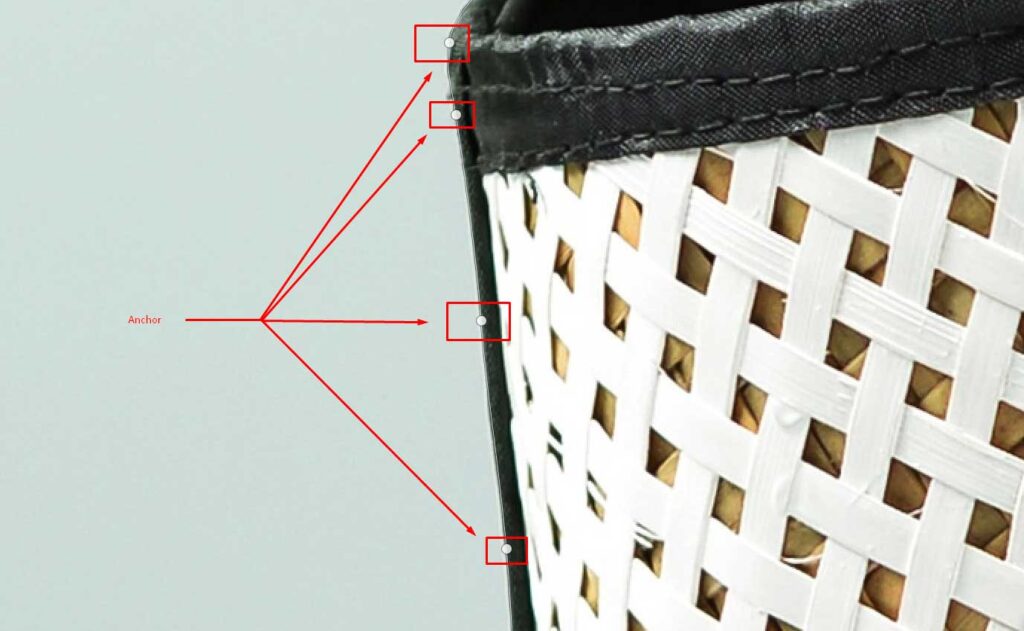
You can start making a path-by-path tool; when you create a path, you have to carefully place every anchor point by clicking on your mouse pointer. After clicking on your mouse pointer, hold on to it and drag your mouse slowly on your object outline. If you need to move any anchor or line, you can move your anchor by the keyboard arrow button or drag it.
When you arrive at your last point, you must connect with your first anchor point by clicking on CTRL. After joining the first and last anchor point then it will create an outline around your object.
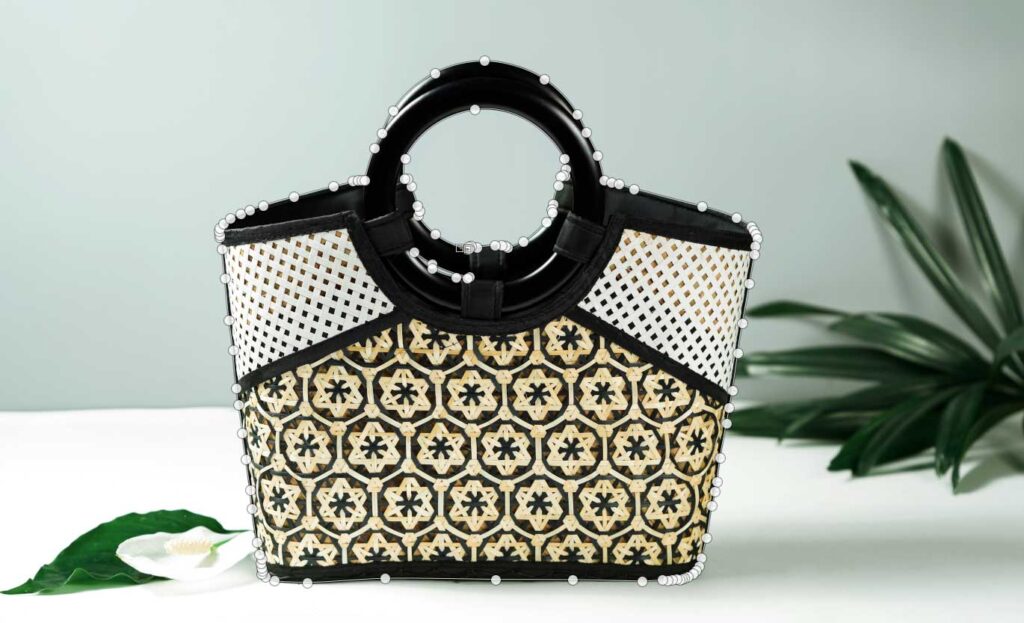
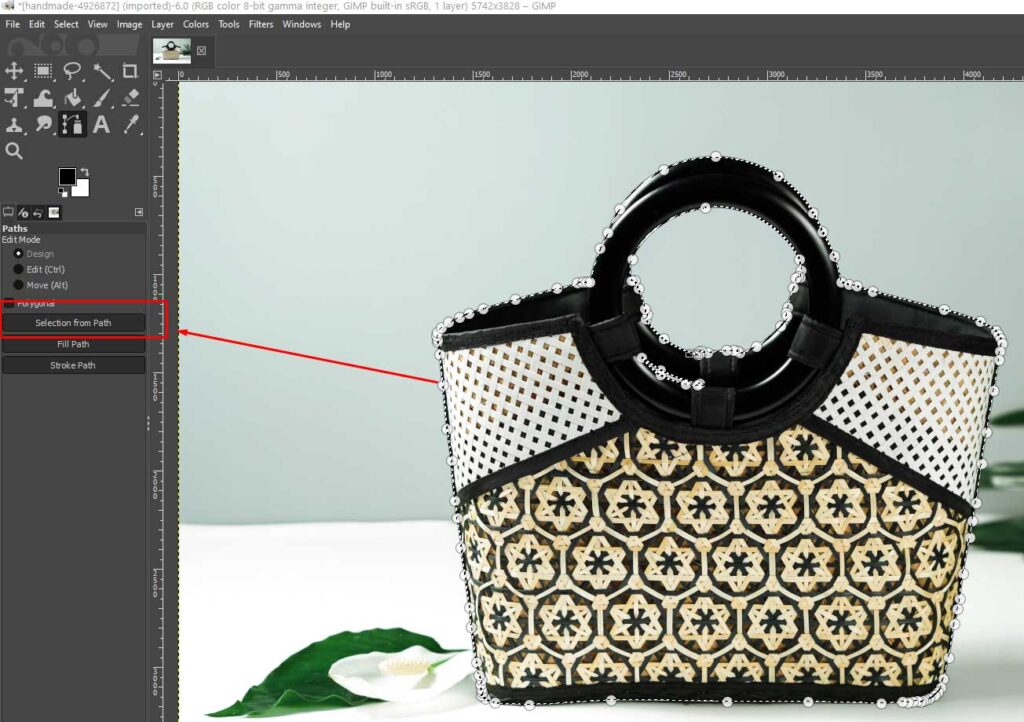
Step Four: Make a Selection
After drawing your path, you can see the left sidebar an option Selection from Path; click on it, and you will see a selection around your selected objects.
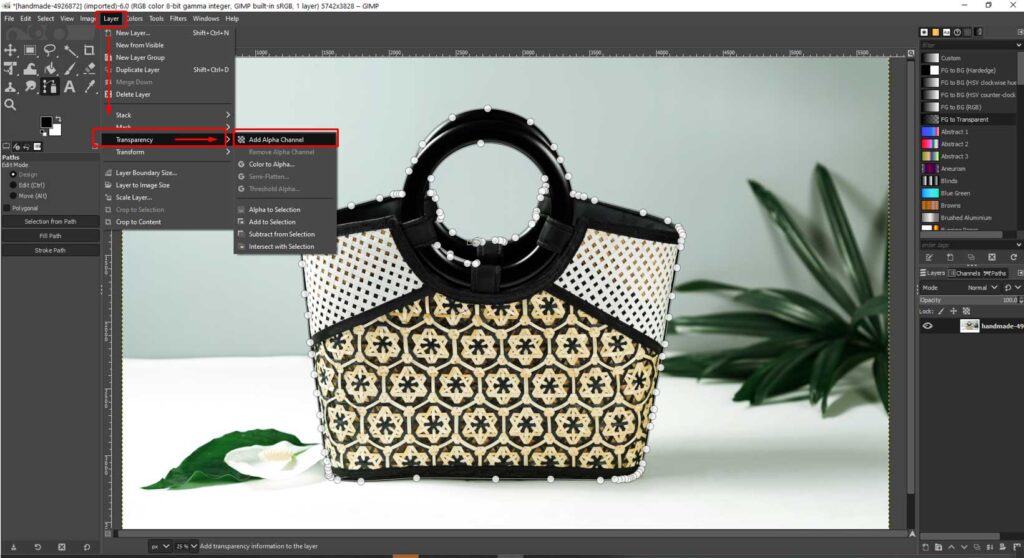
Step Five: Add Alpha Channel
After outlining with the path tool, add the alpha channel from the layer menu to transparency and then add Alpha Channel. That’s it.
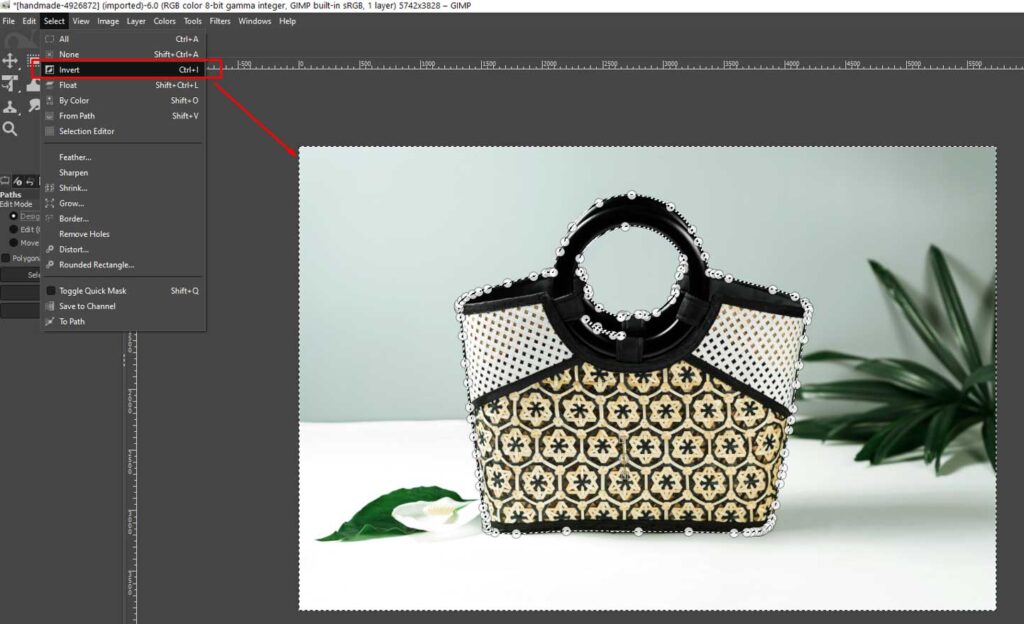
Step Six: Invert Selection
Please press CTRL+I to invert your object sections to background sections. Or you can invert it from the top menu bar, click on select and then press invert.
Step Seven: Remove the Background
After inverting the selections, press your keyboard delete button, or you can press CTRL+X
After deleting the background go to the menu bar, click on ‘select,’ then click on ‘none.’
Step Eight: Save it in Transparent Background
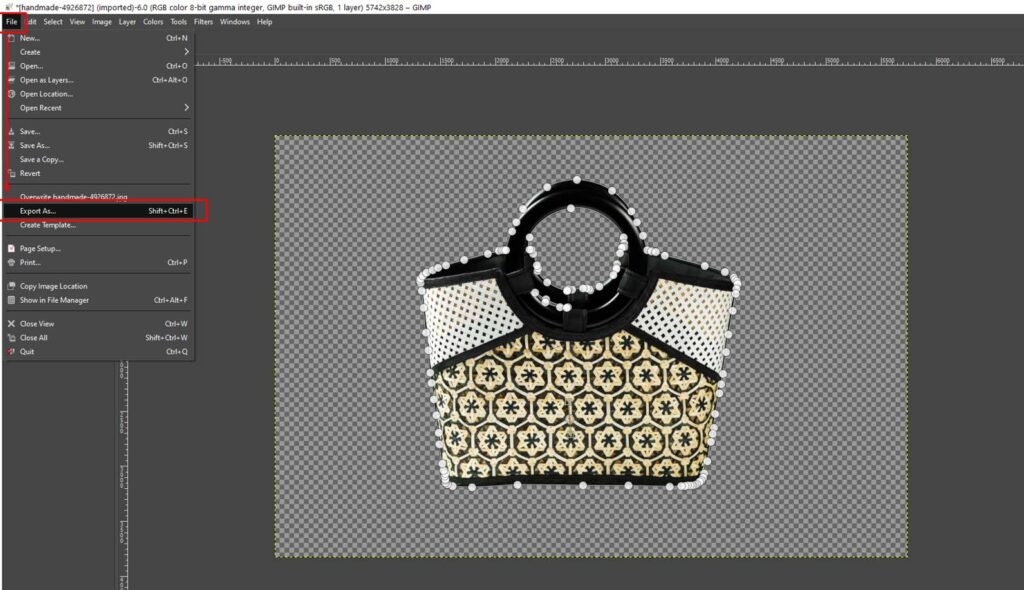
After background removing, save it as transparent background. If you want a picture without a background, you must save it in a PNG format. And, if you want a white background, please save it as a jpg format because the jpg format can’t keep any transparency on your picture background.
So, for doing this, Go to the File menu. Then, click on Export as or Shift+CTRL+E, then click on ‘File type by Extensions,’ and you can see; there many file extensions when you will be scrolling. Then choose the selected file format that you are expecting.
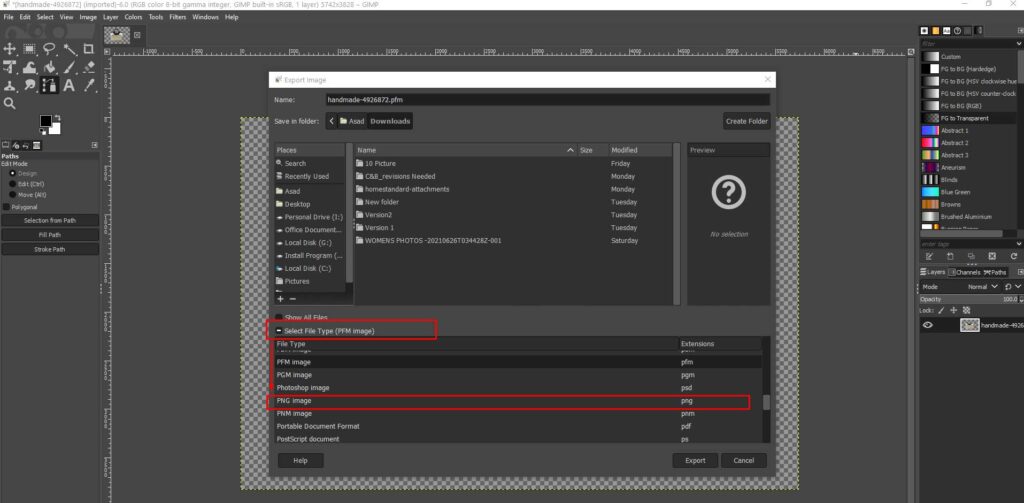
After selecting your file format then press ‘Export’ That’s All.
Method 2: Cut Out Image In GIMP [ Free Selection Tool ]
It is our 2nd method of cut out images in GIMP. This method involves drawing the edge of the selection. However, you can do it by hand or straight lines. For any object, simple or complex, you can apply this method.
Step One: Open Image in GIMP
Let’s open the picture in GIMP.
It’s a pretty nice interface, isn’t it?
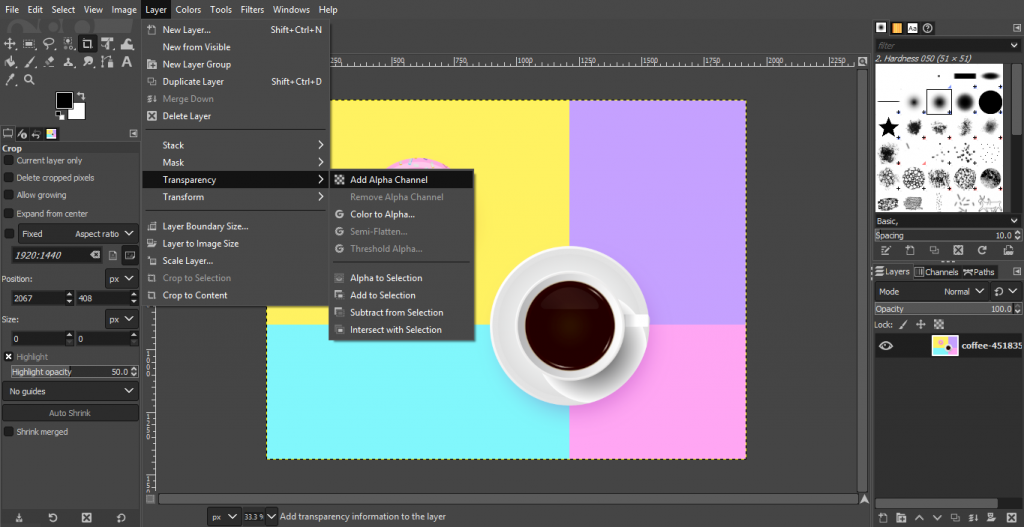
Step Two: Add Alpha Channel
First of all, we have to go to the layer menu. Then go to Add Alpha Channel from the Layer Transparency.
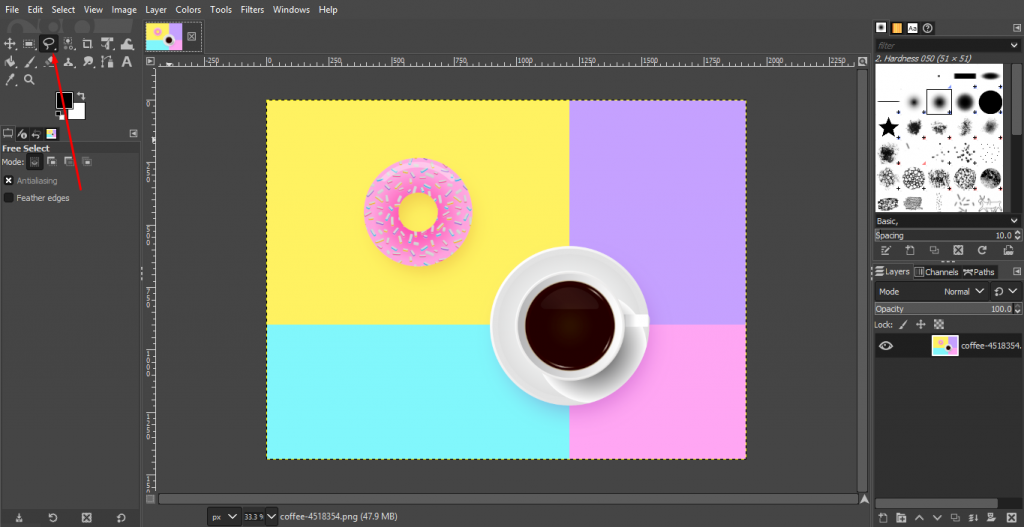
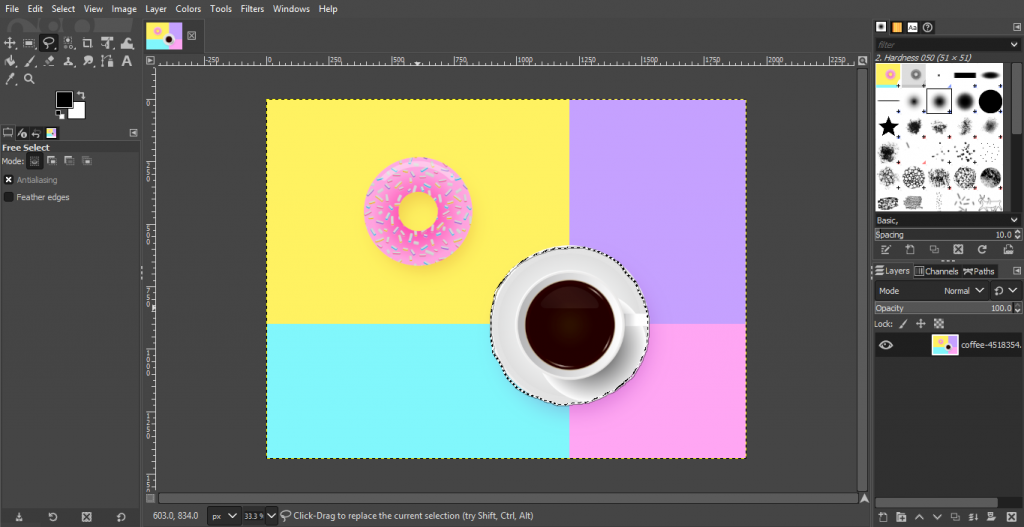
Step Three: Select Free Selection Tool
After that, select the free selection tool from the top of the menu. Have a look at this picture.
Step Four: Create an Outline Around Object
After picking up that tool, create a line around your object just like that.
To do this with accuracy, you have to take a well amount of time. This is a bit harder compared to the photoshop selection process.
Step Five: Joint The Beginning Point and The Ending Point
Like the pen tool, make sure that you are finishing on the starting point. Otherwise, it will not convert into selection.
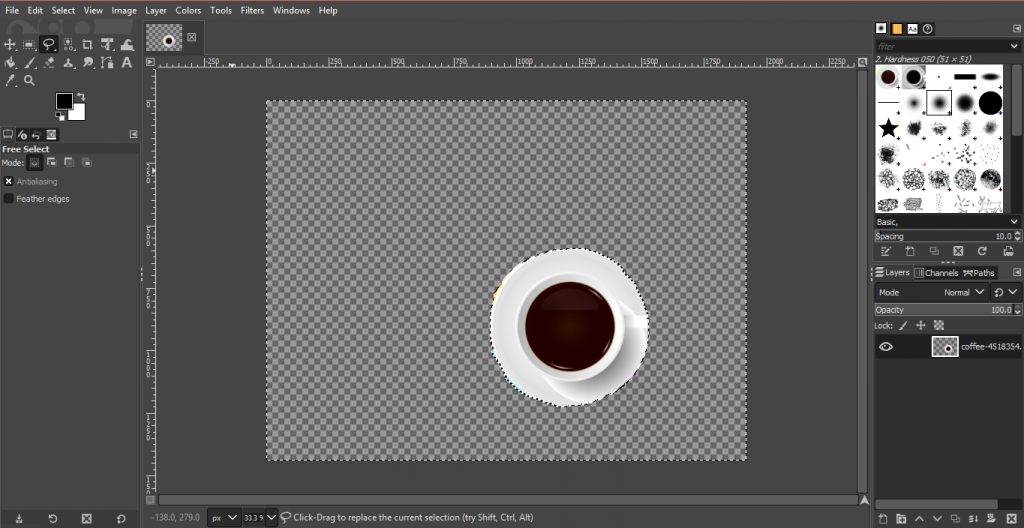
Step Six: Delete the Background
When you are done, press CTRL+X to cut out the object in Gimp. If you want to remove the background, then you have to choose invert from the select menu.

a
How To Cut Out Image in Photoshop
Okay, now you are able to cut out the image in GIMP. But, if you’re a photoshop lover and want to edit photos with photoshop, it is for you. We will discuss; how to cut out images in photoshop. Basically, in this tutorial, we will show you; four different methods of the cut out images in photoshop.
Let’s begin.
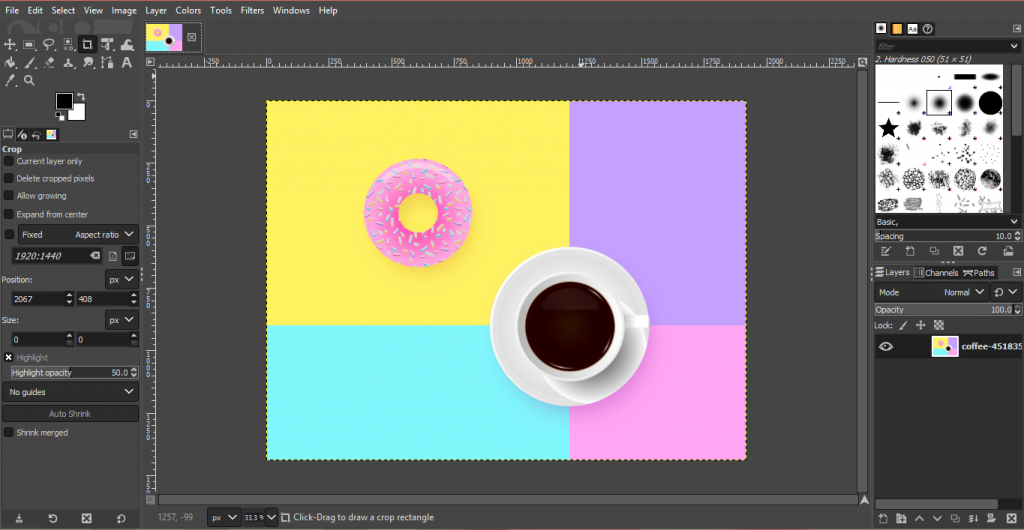
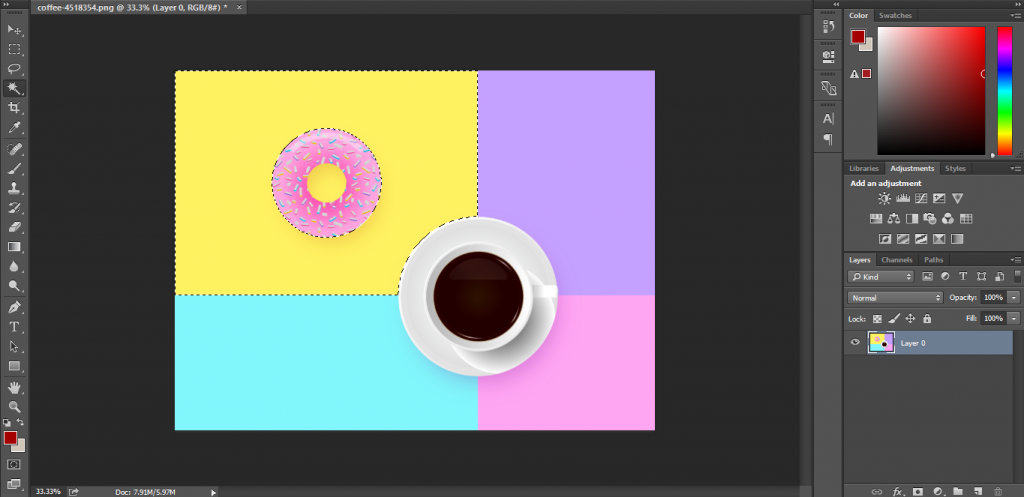
I want to show you the examples with this picture.

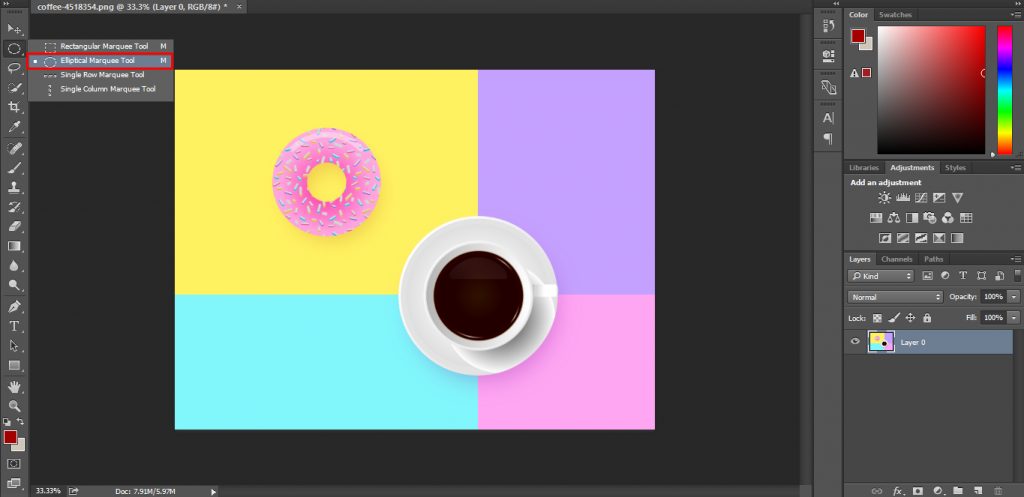
Method 1: How To Cut Out Image In Photoshop [ the Marquee Tool ]
If your object has a shape like a rectangle or elliptical, the marquee tool will be a good choice for you. You can pick the tool from the left toolbar. As my object is Elliptical, I am going to choose this option.
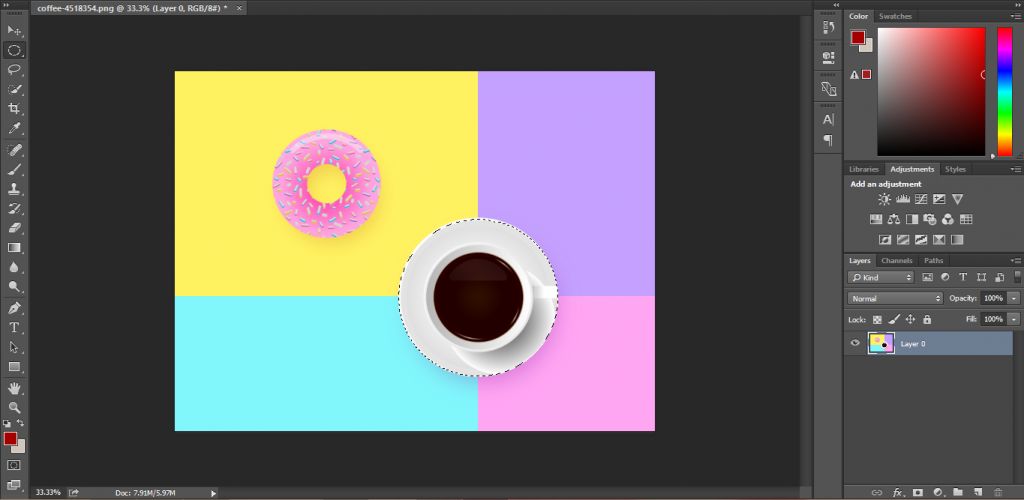
Step One: Draw a Circle Shape
After picking the tool, press & hold the left mouse and drag it down to create a circle shape.
You have to keep in mind that you can move the selection by pressing the Space Bar. Once you left the mouse, you can’t resize the shape. So, hold your mouse and use the space bar until you got the proper form. Please have a look at my object.
Step Two: Object Selections & Moveable
I think I have got the right shape. Now, the object is selected. To cut out the object or move the selection, press CLT and click on the selection. Then, you will be able to move the selection as you want.
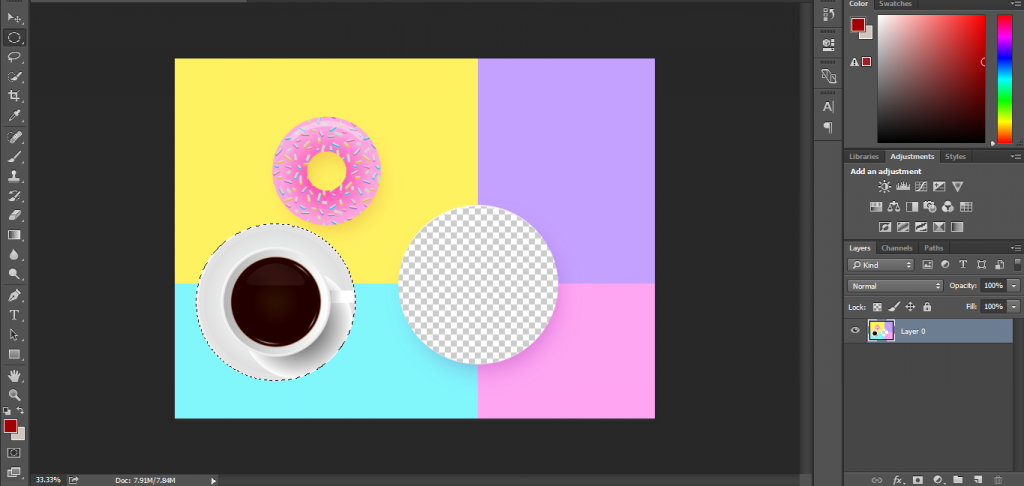
Step Three: Inverse selection & Press Delete
Isn’t it cool? If you want to keep the object still and cut out the background, you don’t need to move the object—Press CTRL+SHIFT+I for inverse selection and press Delete. Here you go.
If pressing Delete without making an inverse selection, delete the object as it would be the selected portion.
Step Four: Multi selection inside the object
Suppose there is a hole inside your object. Then, how to cut out those objects? You don’t have to worry about it. It’s a simple procedure.
Choose the object as we have done earlier. Then press and hold ALT. It will enable multi selections inside the object. Afterward, select the hole, and the rest of the things are similar to the previous one.
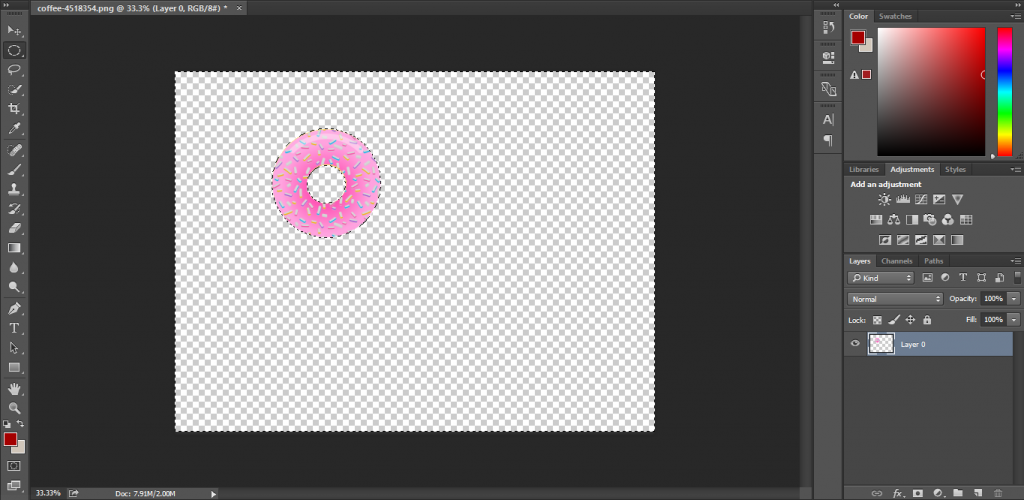
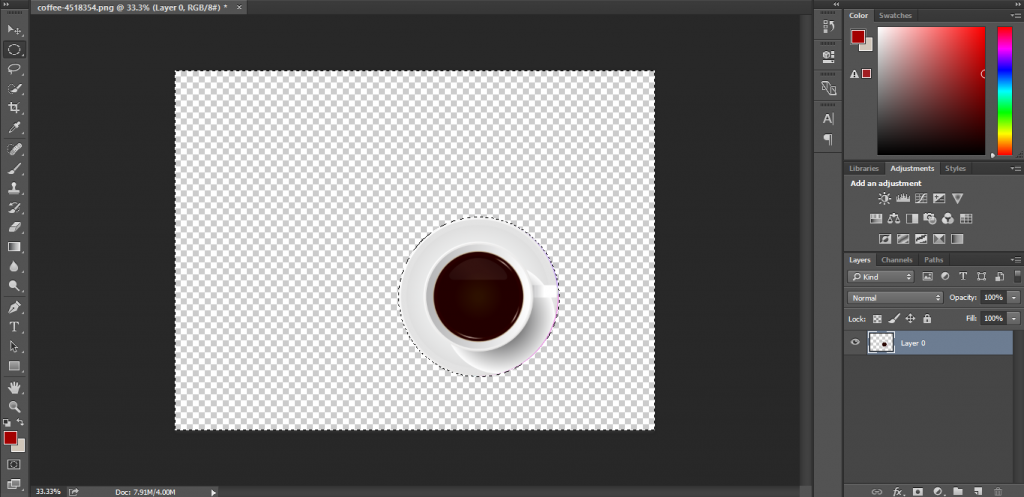
See, we have got our object in transparent background. At this stage, you can use the arrow key from the top of the Marquee tool to reposition the object.
Method 2: Cut Out Image In Photoshop [ Quick Selection Tool]
Another excellent and easy way to cut out an image in Photoshop is by using the quick selection tool. How to do this?
Okay, let’s start.
We will cut out the image with photoshop quick selection tool.
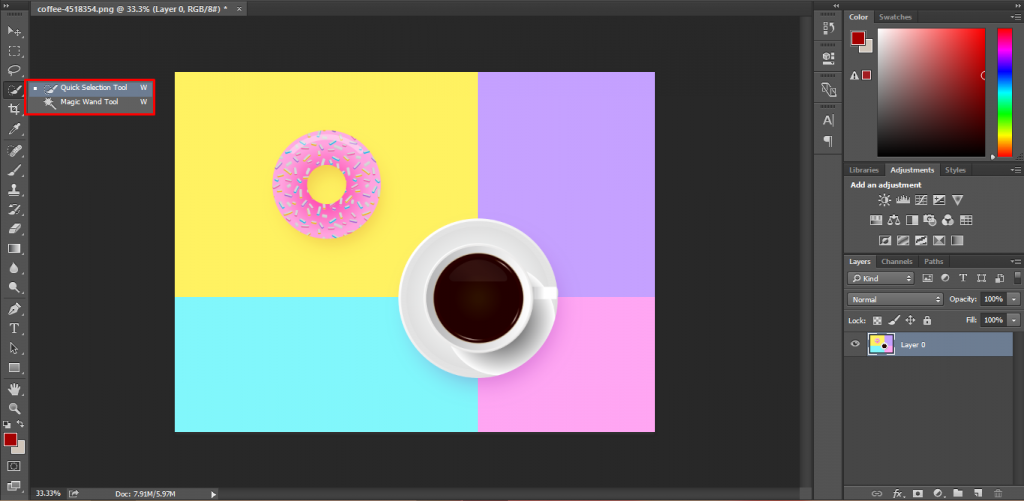
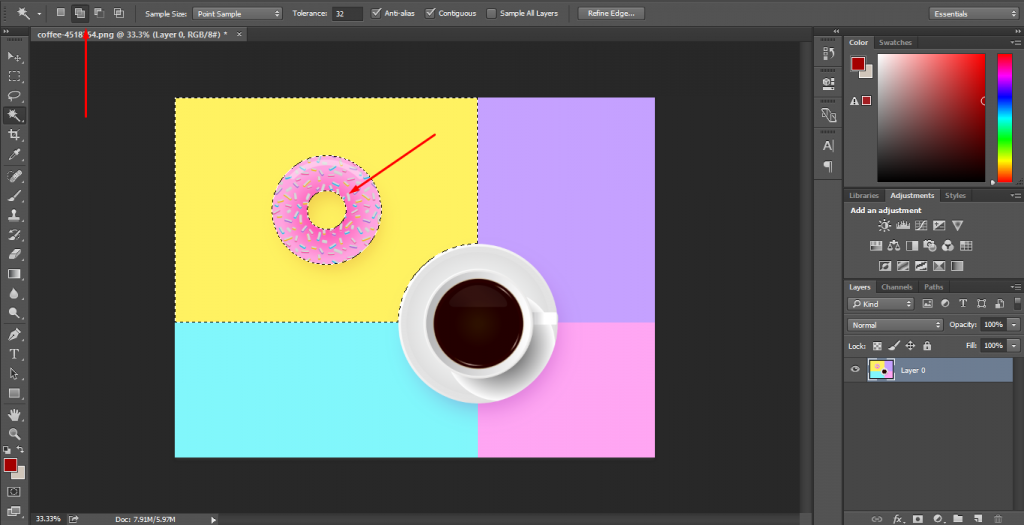
Step One: Pick the quick selection tool
Pick the quick selection tool and drag the mouse over your object. It will catch the object boundary line. Like this,

If your object doesn’t have any sharp edges, the quick selection tool is one of the best options for making a selection.
But, if there are sharp edges available in the object, the quick selection tool won’t be too beneficial. However, let’s move forward.
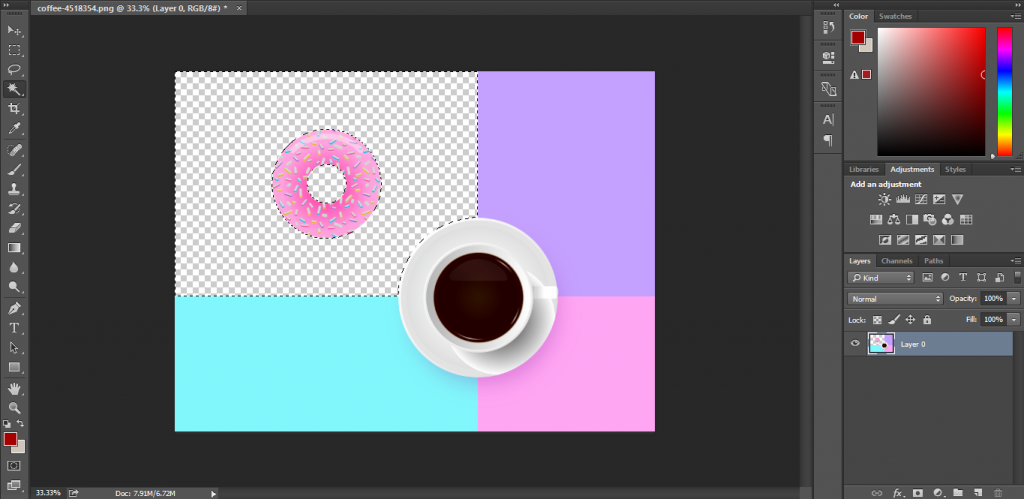
Step Two: Use the Magic Wand Tool
You can also use the Magic Wand Tool. This tool helps you to choose the object just with one click. Mainly, it makes the selection according to color and contrast. After picking this tool, I clicked on the yellow portion.
See the result; it has selected the yellow color area. Do you want to do a multi-selection? Then you have to select that option from the top, and after that, you can do multi-selection.
Step Three: Press Delete
At this stage, pressing the Delete key will remove the yellow area just like this picture.
Undoubtedly, this magic wand tool is a helpful feature, especially for the beginner Photo editor it’s convenient.
Enjoying the tutorial? More cool processes are waiting for you.
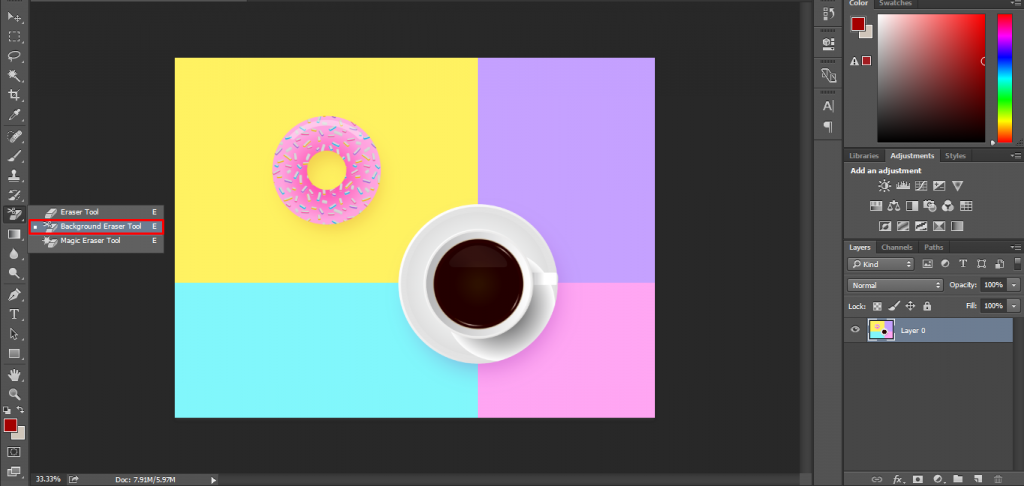
Method 3: How To Cut Out an Image In Photoshop [Background Eraser Tool]
Yes, you can also cut out images in photoshop with the help of the background eraser tool. For doing this, select the background eraser tool from the left side tool panel. However, you can also select it by pressing the keyboard short cut key “E.”
Draw the mouse over the background
Do you know how it works? Select the tool and press & hold the left mouse. After this, drag your mouse over the background, and it will only erase the background.
Let’s have a look at my object.

See, the yellow background has been removed from the picture.
It’s better for solid color background
You can use this tool when you want to remove a plain color background from the photo. But if there are lots of colors and shades, it might not be convenient for you. Then, which tools to use in that case? How to deal with those objects with lots of shades and colors? Wait, the following procedure has the solution.
Method 4: Cut Out Image In Photoshop [ With Pen tool]
The pen tool is the best tool in photoshop for cutting out images. This tool allows you to keep control of your hand while editing. Every professional clipping path service provider uses this tool at the time of cutting out images or background removal.
Step One: Select Pen Tool From Tool Bar
Pen tool is a safe option when you want to cut out an image in photoshop. It is such a tool that can help you to make an accurate selection. You can choose it from here.
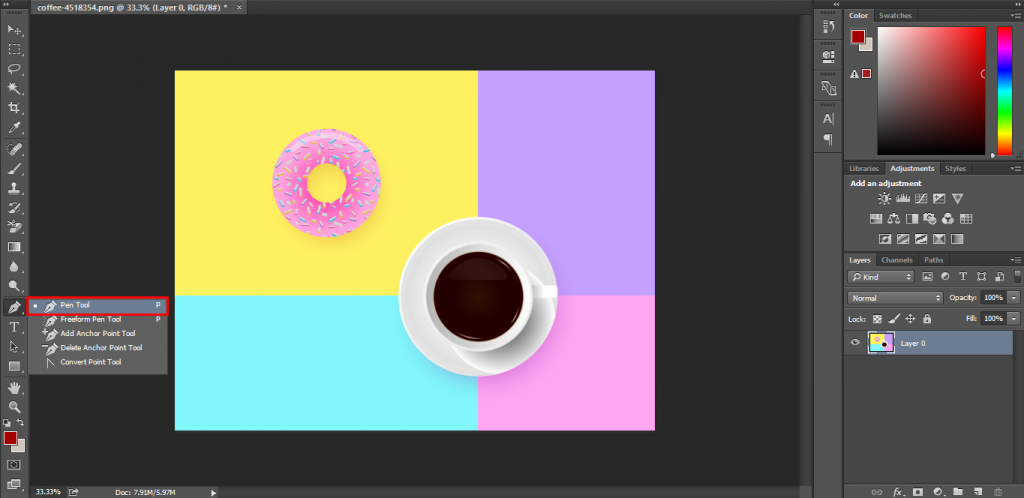
Step Two: Create A Path Around The Object
After taking up the tool, you have to create paths around the objects like the below picture.

Step Three: Make Selection
When you complete the path drown, right-click on the mouse and select Make Selection. Then your object will be selected. To cut out the object, you can use the arrow key.
Step Four: Invers The Selections & Press Delete
If you don’t want to keep the background, make an inverse selection and press Delete.

Conclusion
Using GIMP and Photoshop, you can cut out a small portion of photos or remove the entire background.
Both of these software are well-reputed in the photo editing industry.
You can use them to make a transparent background or white background.
Still confused, which one should you use?
okay, if you want to learn more details about both of these photo editing software, check out our article about GIMP vs. Adobe Photoshop.
Even after, if you cannot cut out an image, then you can do it by hiring a service provider.
Want More? Try Our Photo Post-Processing Service
If you’re a busy person and don’t want to take the hassle of photo cut out, don’t worry, we can help you.
Clipping Path Action is a professional photo post-processing service provider. Having a highly skilled photo processing team, we are committed to delivering spark-looking photos within pre-scheduled time.
We guarantee; you won’t be disappointed.
You can try our service at cost-free using our free trial service. It will help you a lot.
However, if you are ready to do this yourself, follow the step we shared.
Hopefully, you will be successful in cutting out images in GIMP and Photoshop.
Cheers
Related Articles
How to change skin color in photoshop
How to remove shadows in photoshop
real estate photographer brooklyn
how to sell your photos on etsy
best app for real estate photos